
How to block a port in a Windows firewall?
Blocking a port in Windows Firewall is an essential way to manage network security and control access. This guide will show you how to quickly block a specific port, helping you protect your system from unwanted traffic and potential threats.
Press "Win + R" type "control" and press Enter to open the Control Panel.
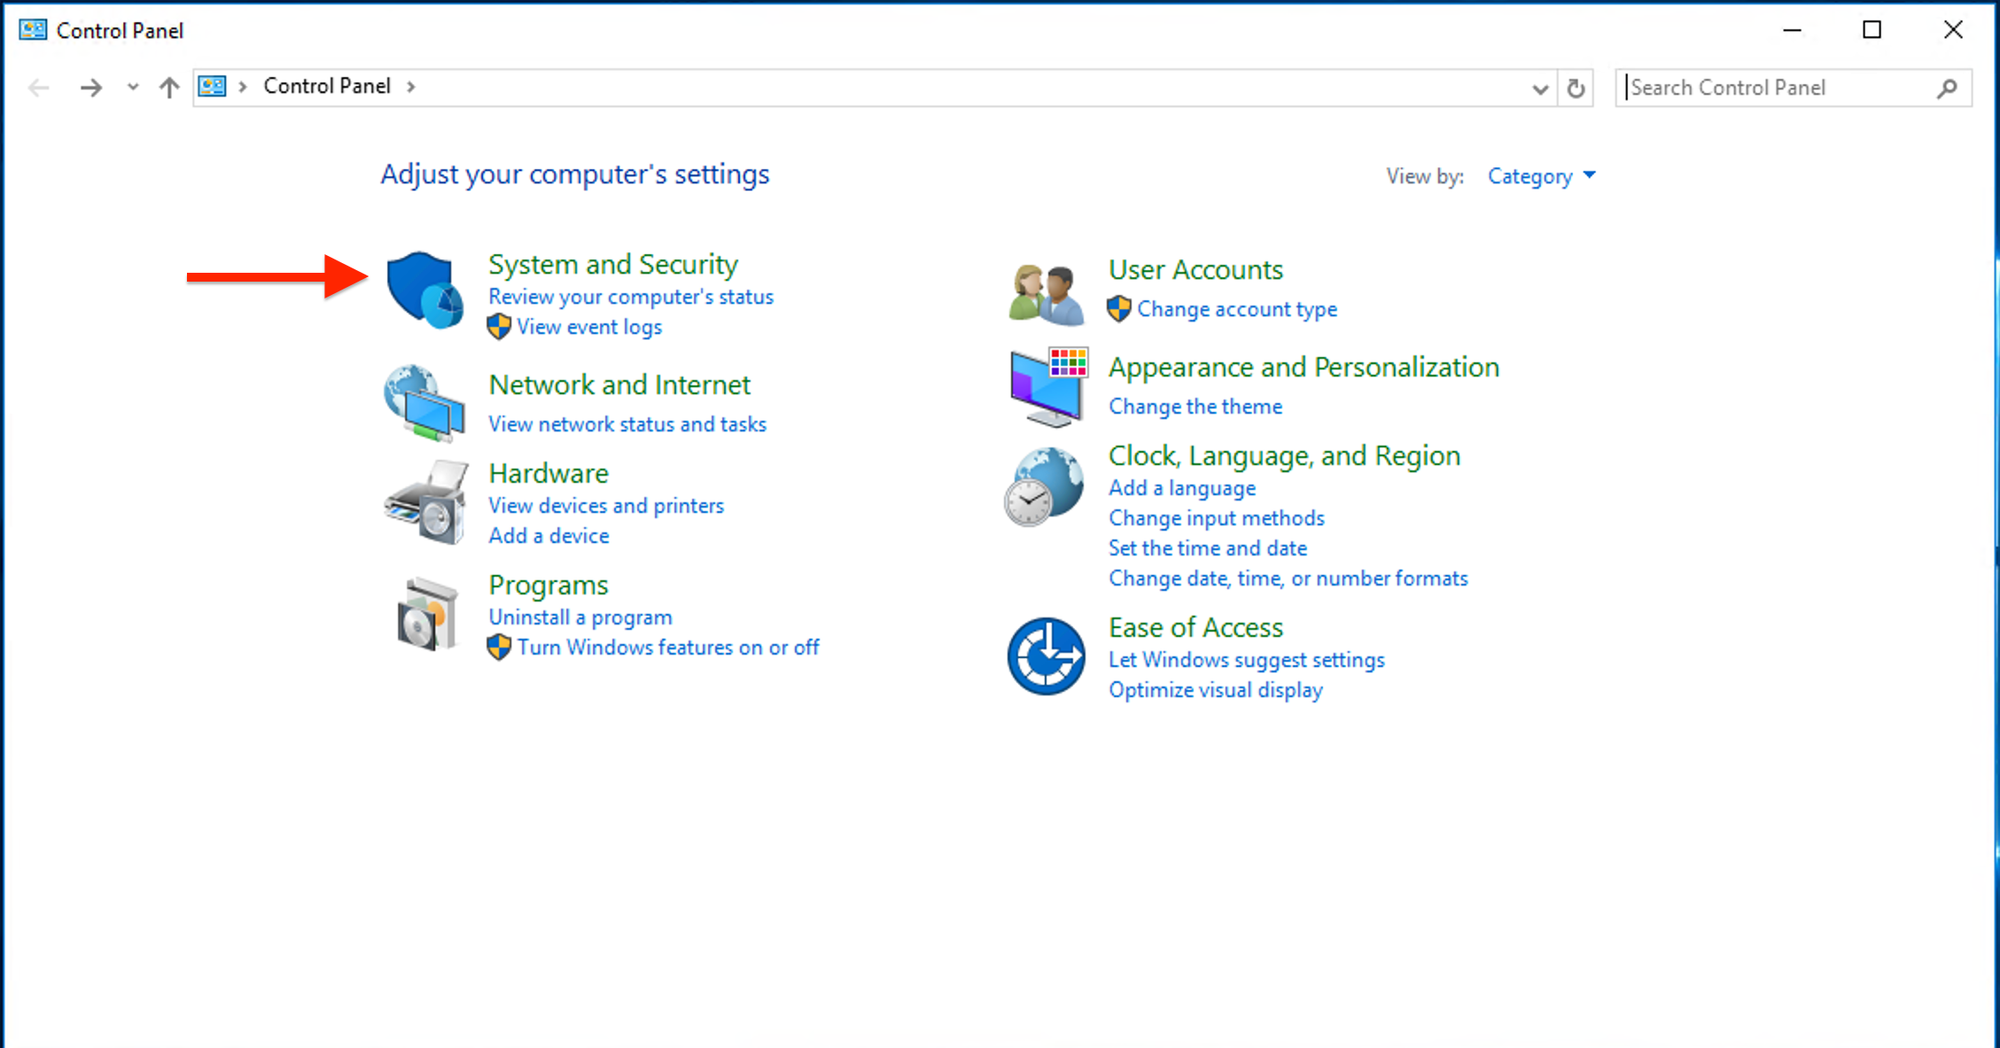
Navigate to "System and Security" > "Windows Defender Firewall".
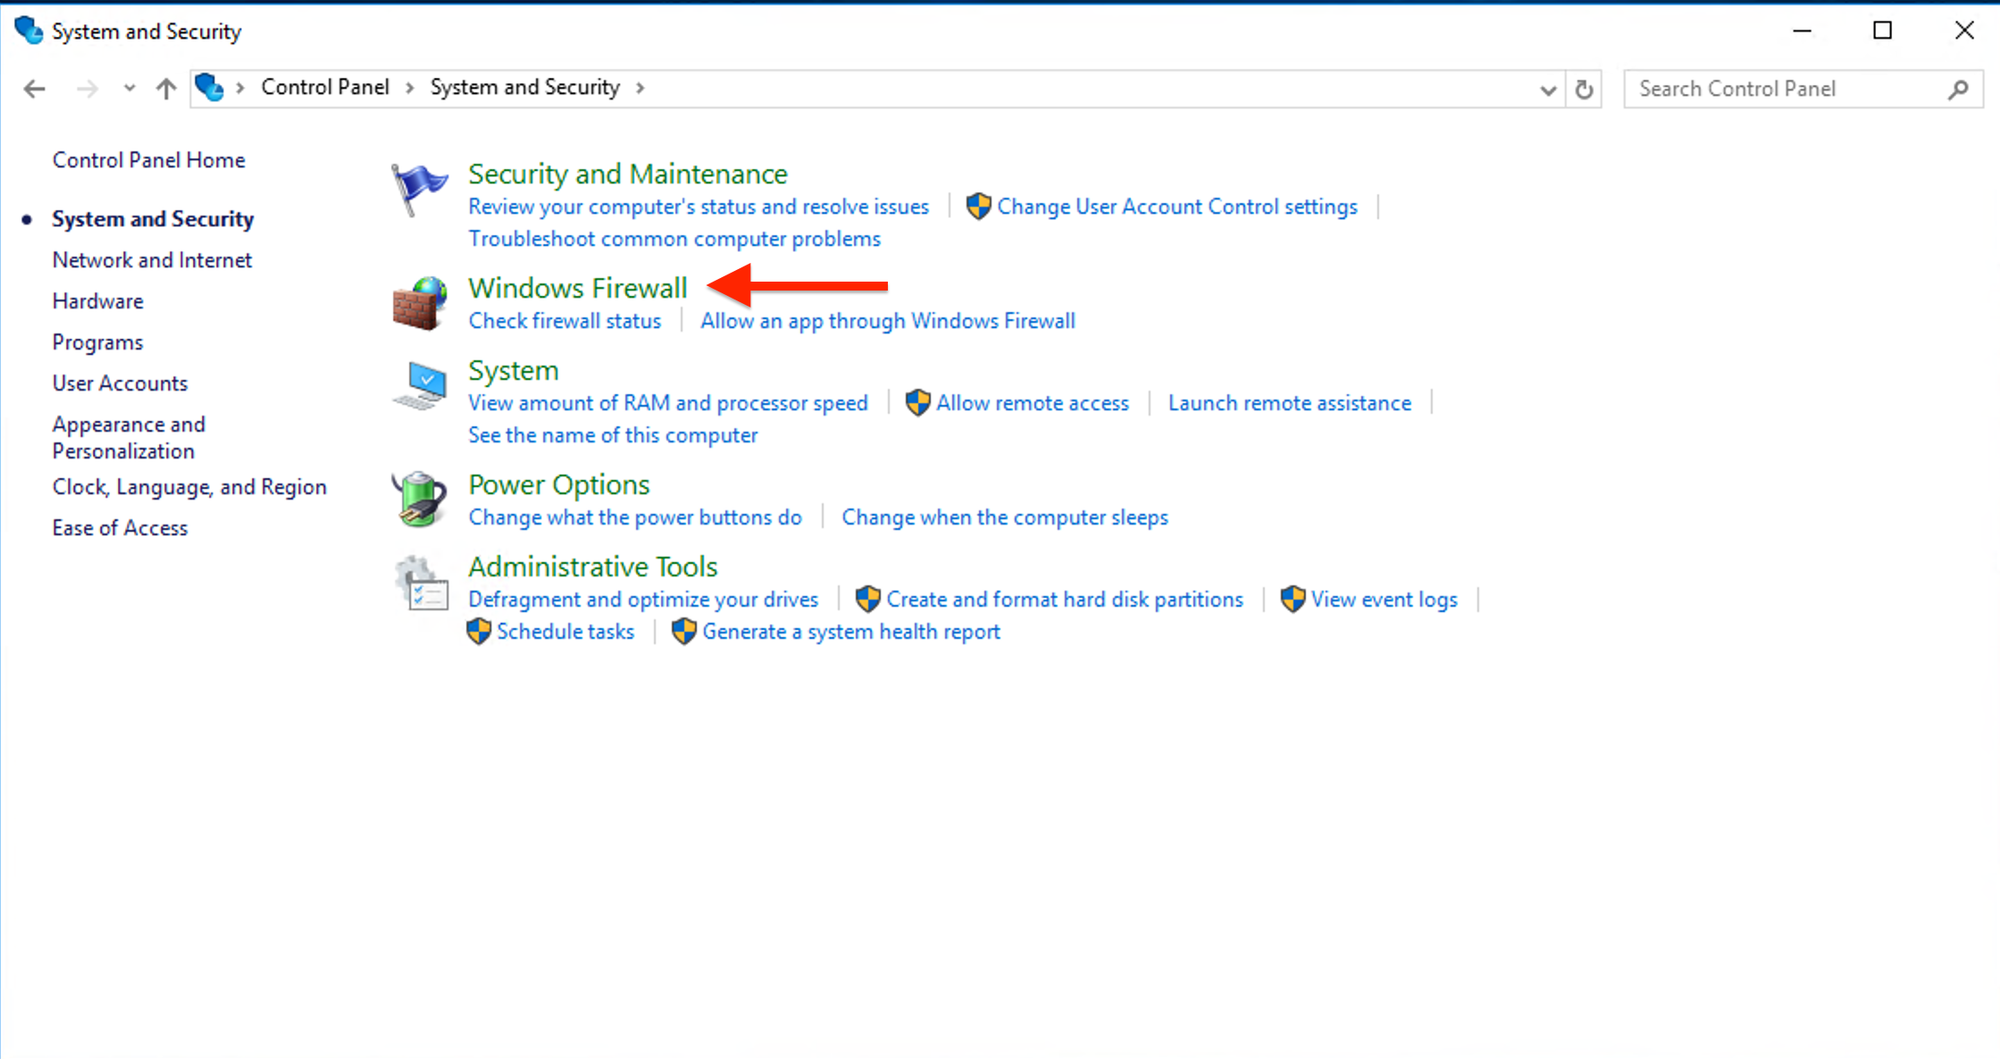
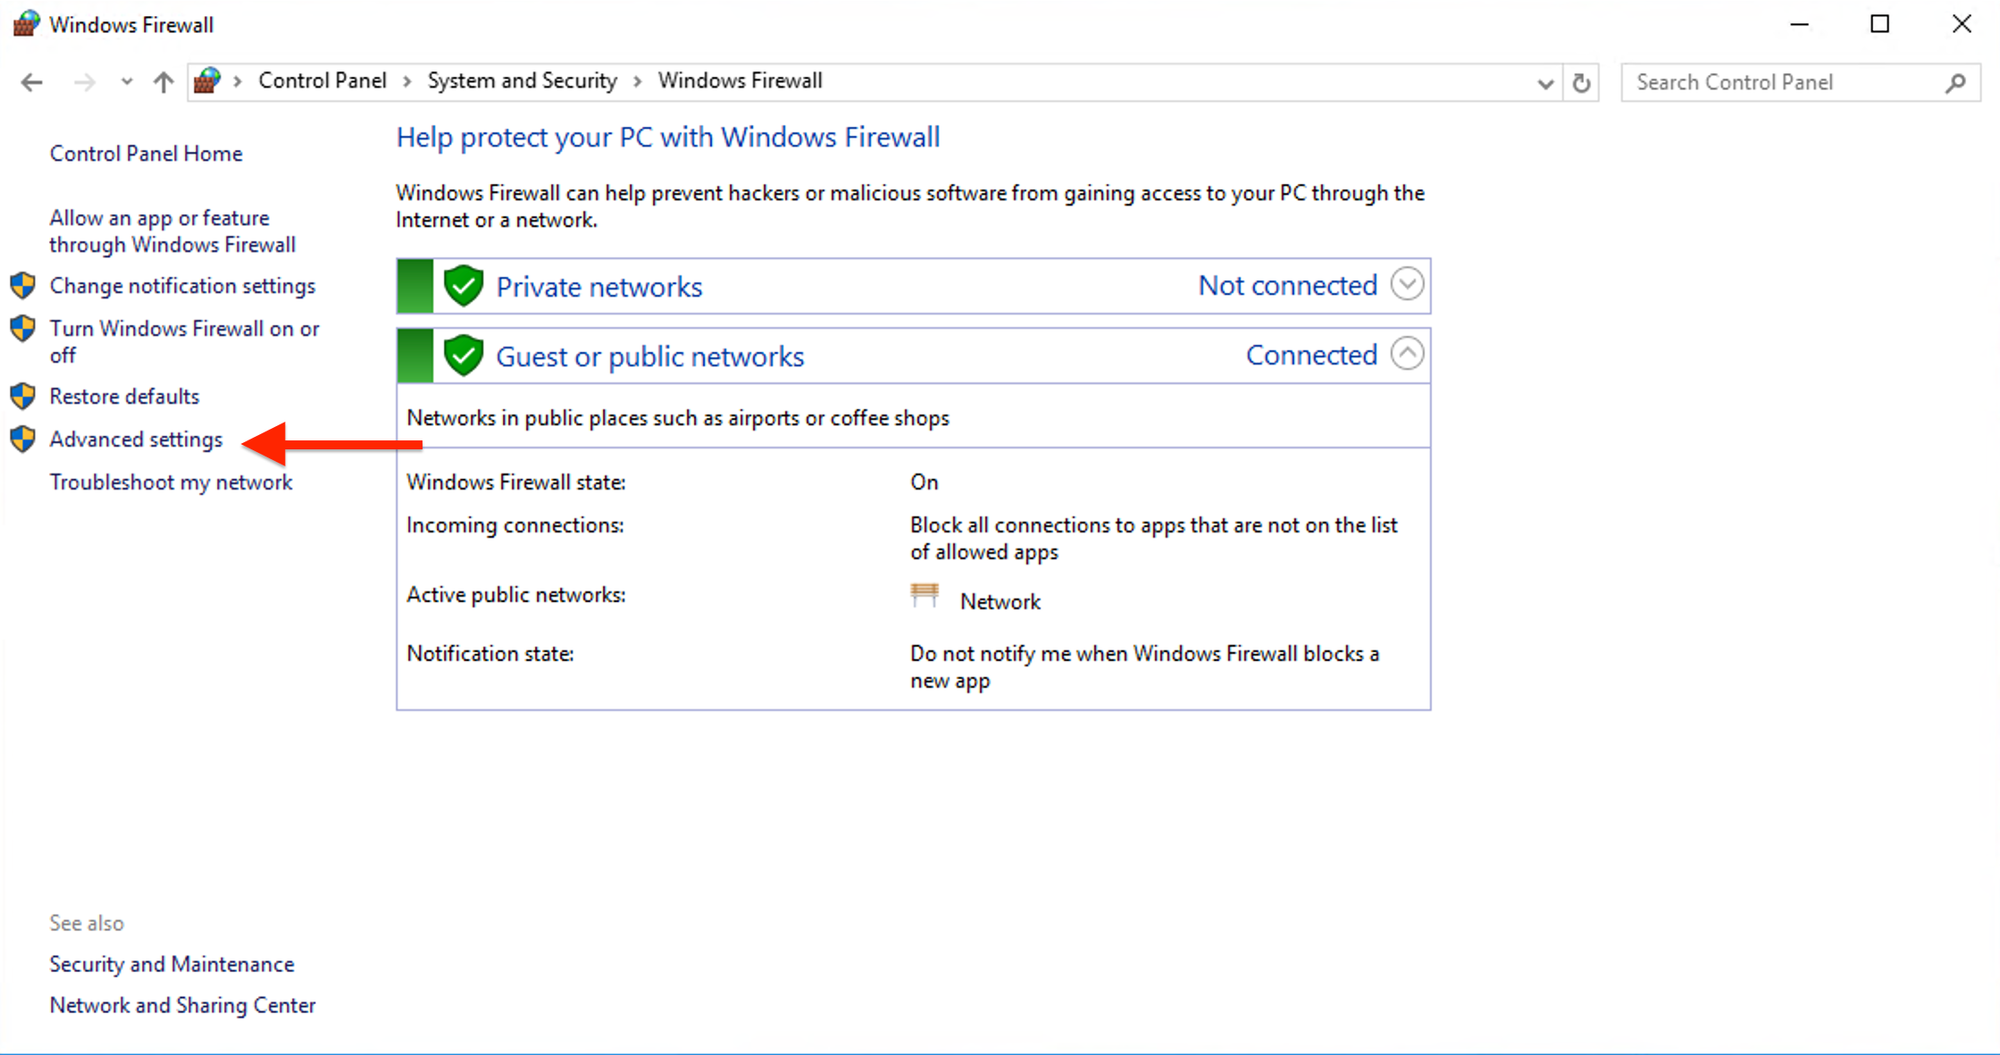
In the Windows Defender Firewall window, click on "Advanced settings" on the left.
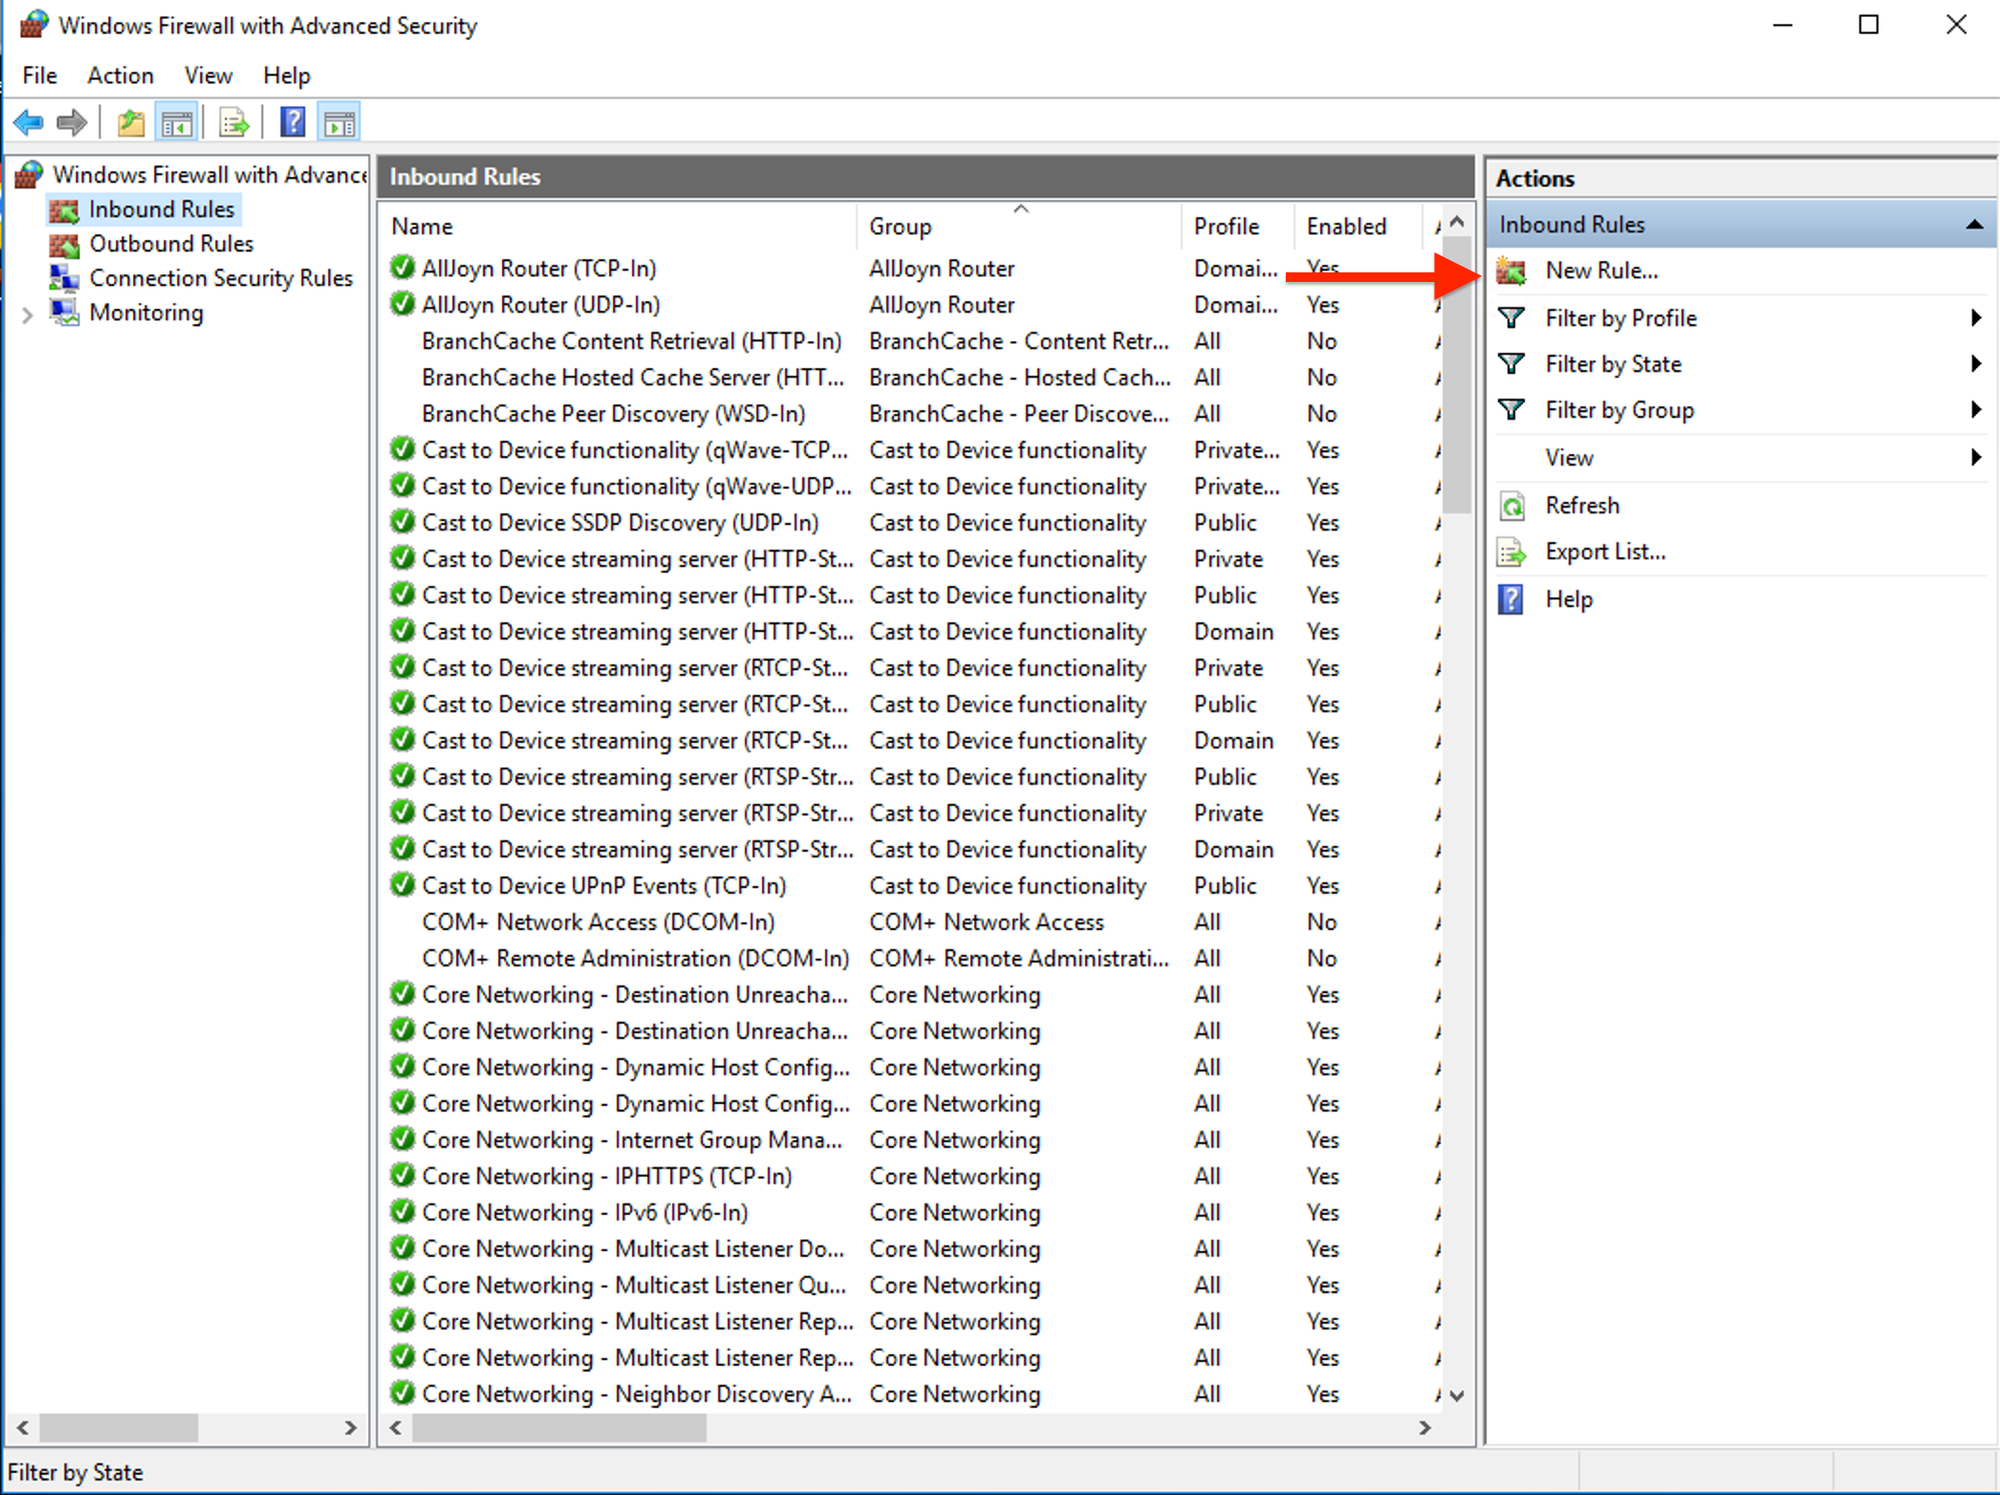
In the "Windows Defender Firewall with Advanced Security" window, select "Inbound Rules" on the left.
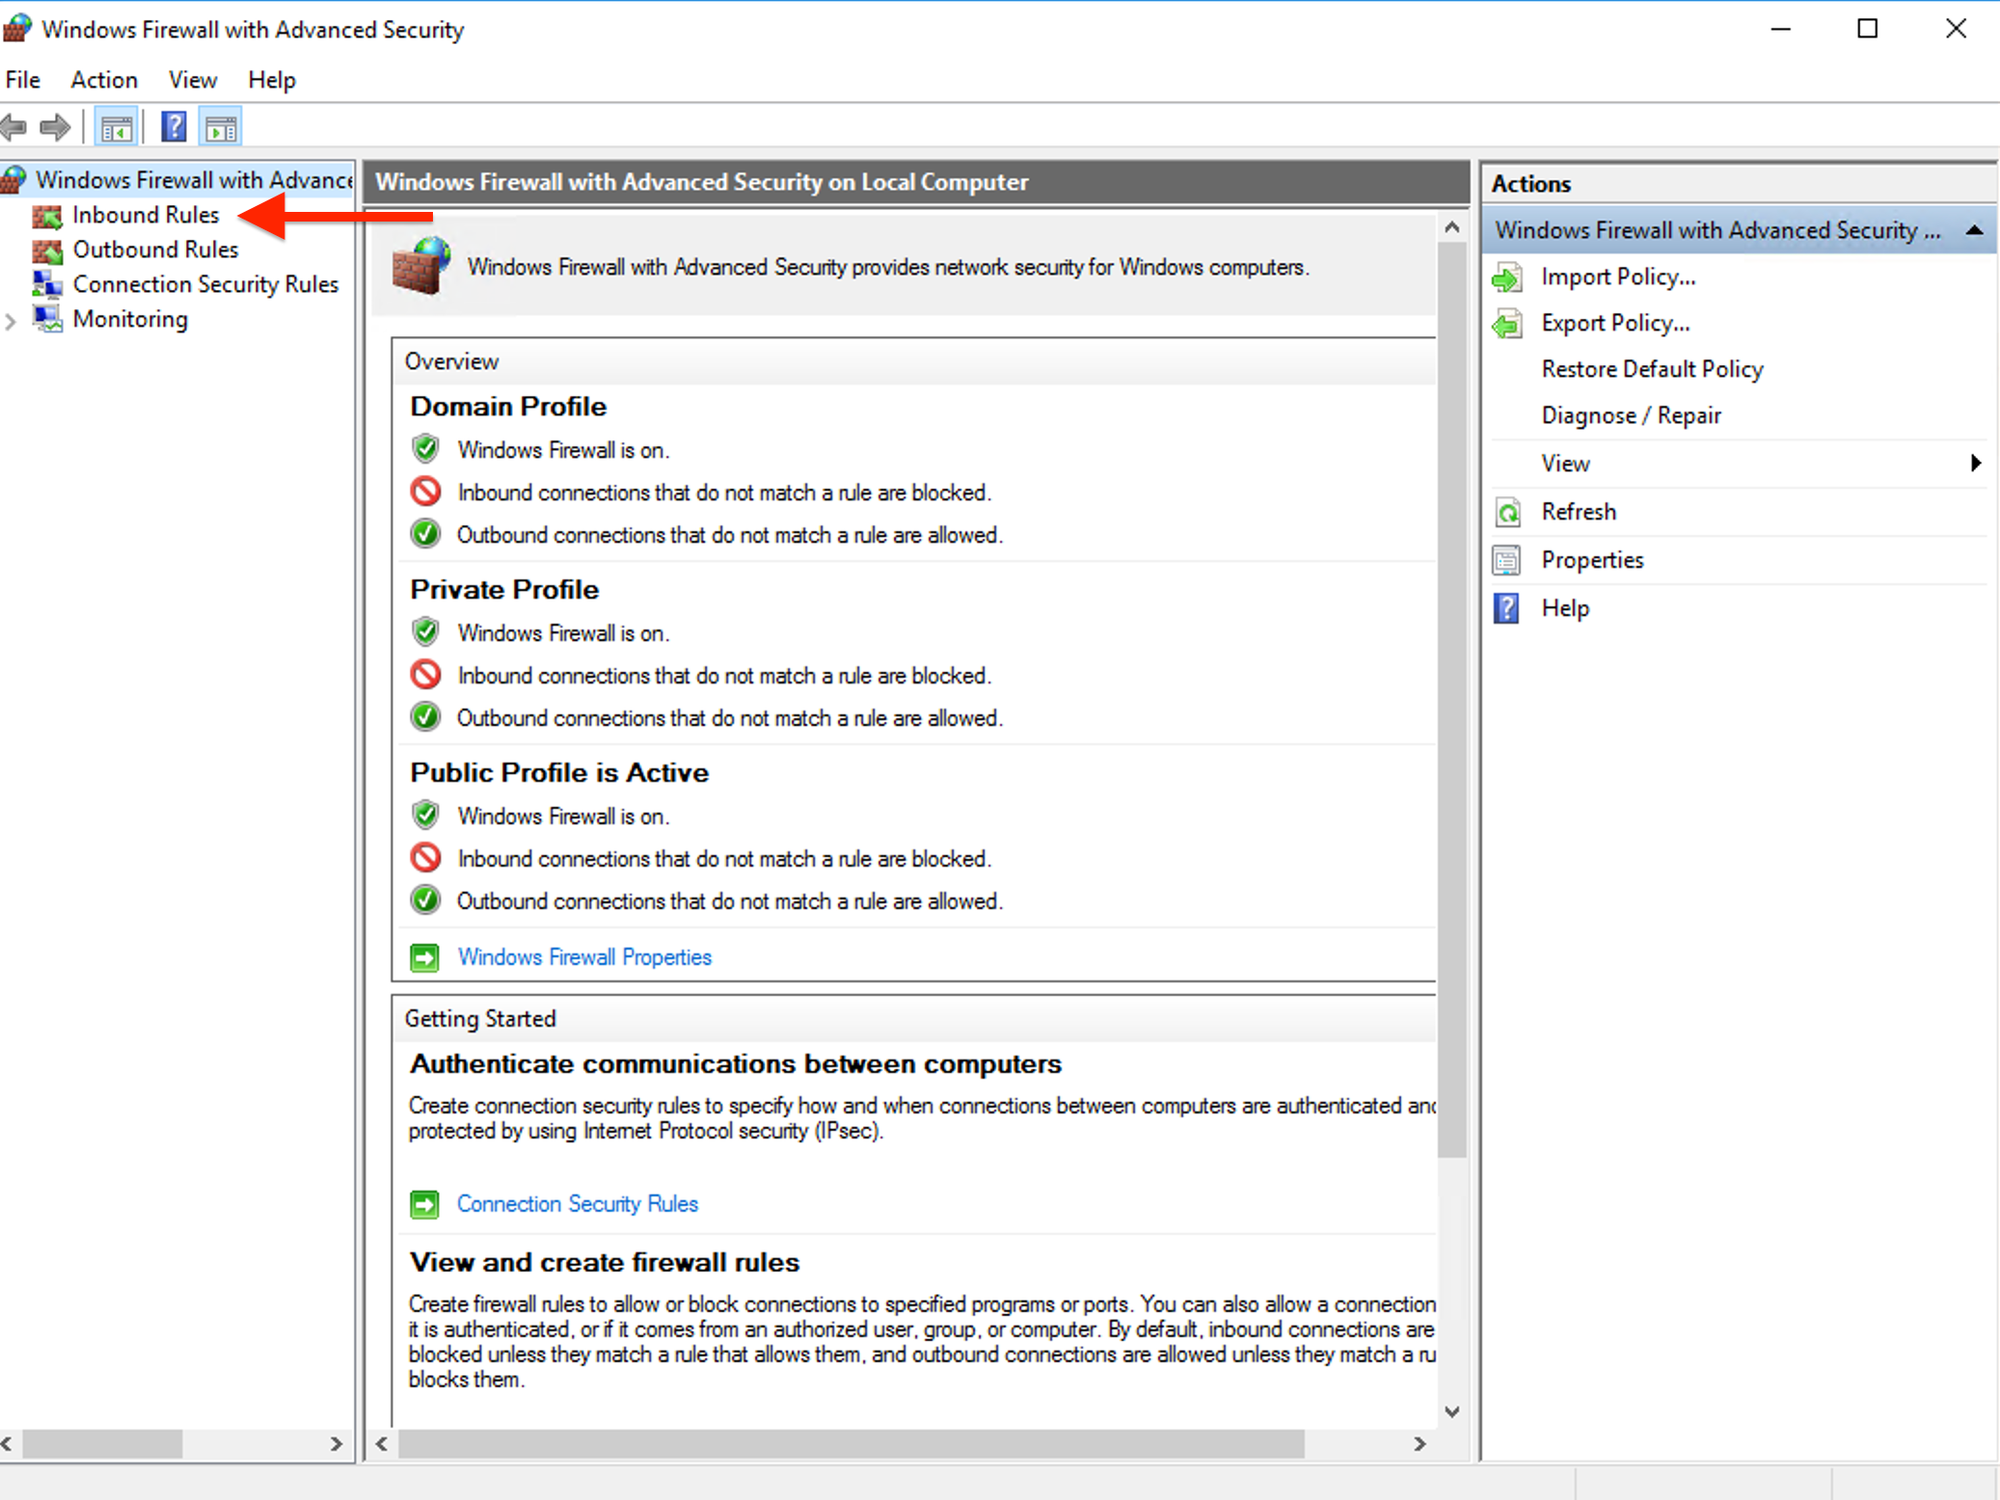
Click "New Rule" on the right pane.
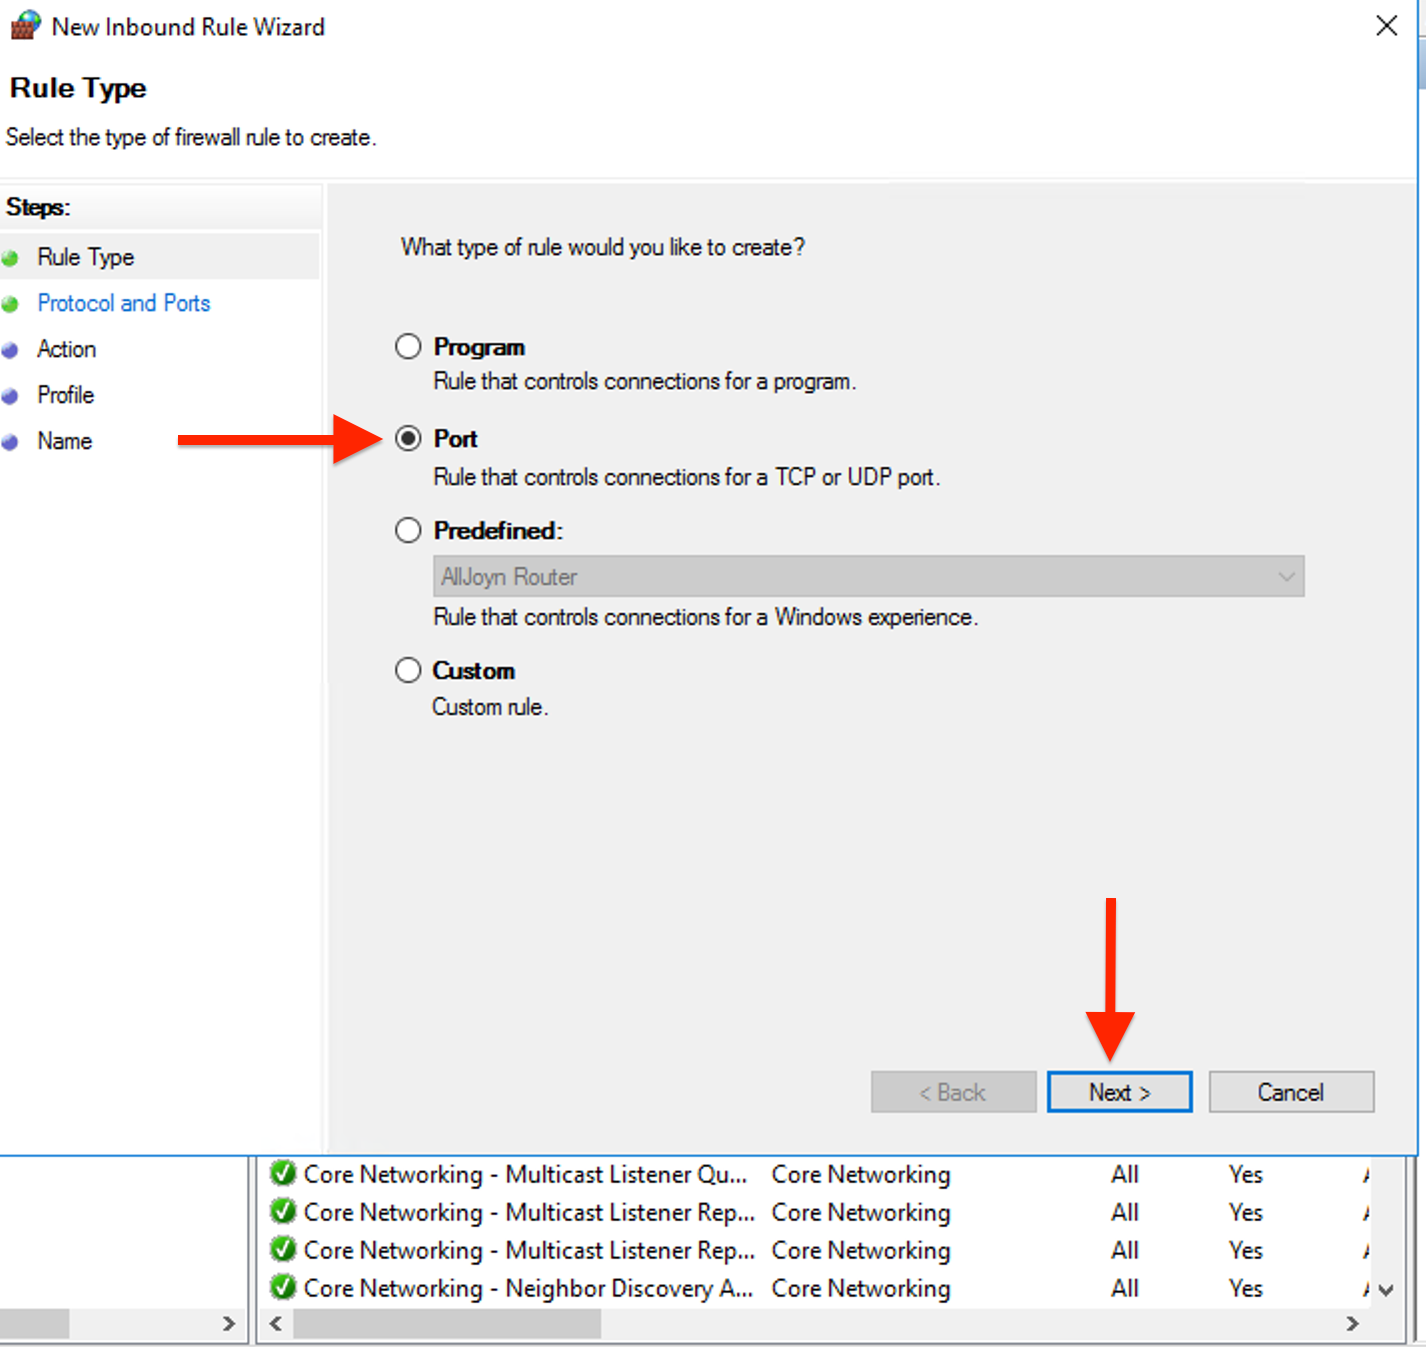
Choose "Port" and click "Next".
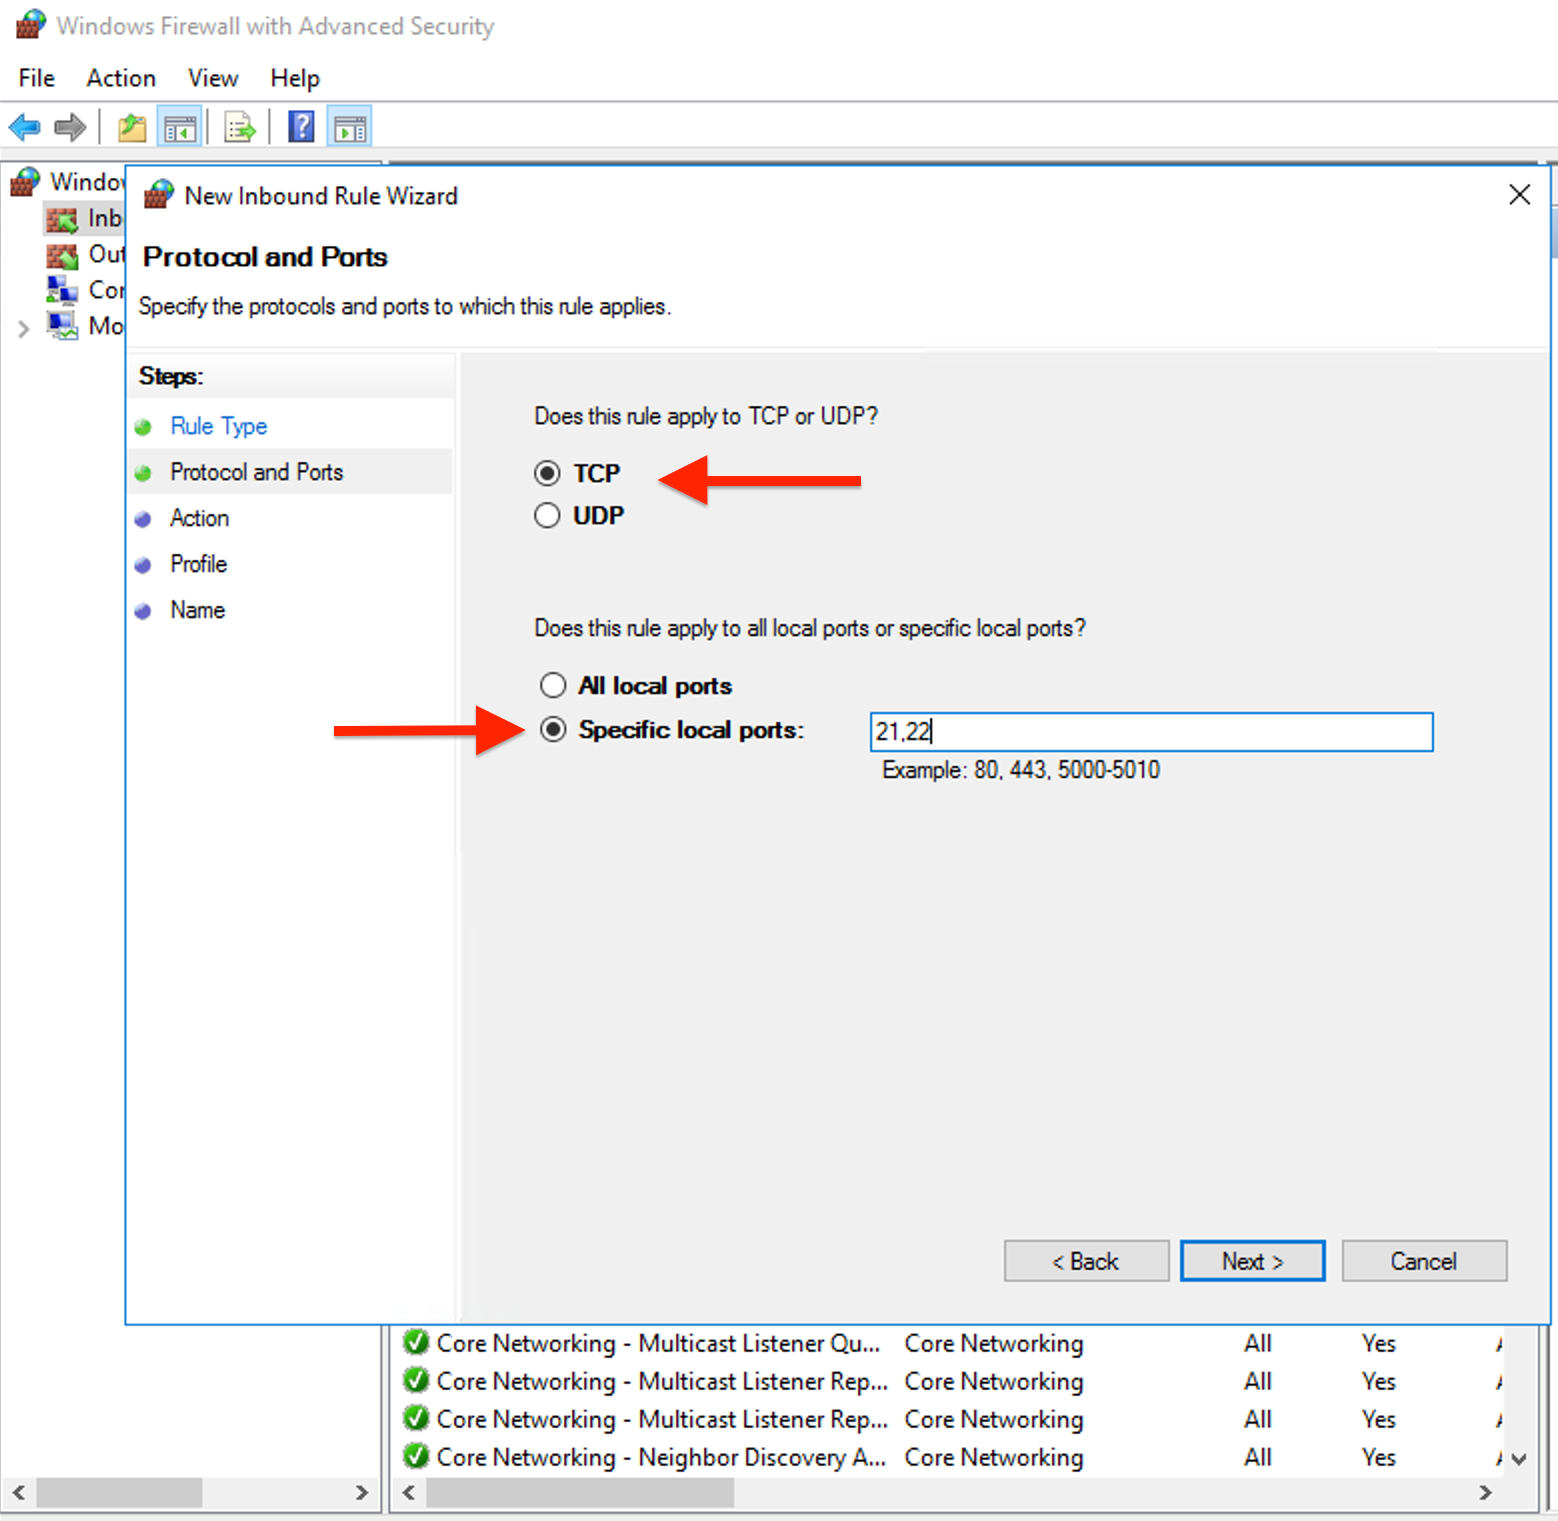
Select "TCP" and specify the port number. Enter the specific port number or range you want to block (e.g., 21,22) Then, click "Next".
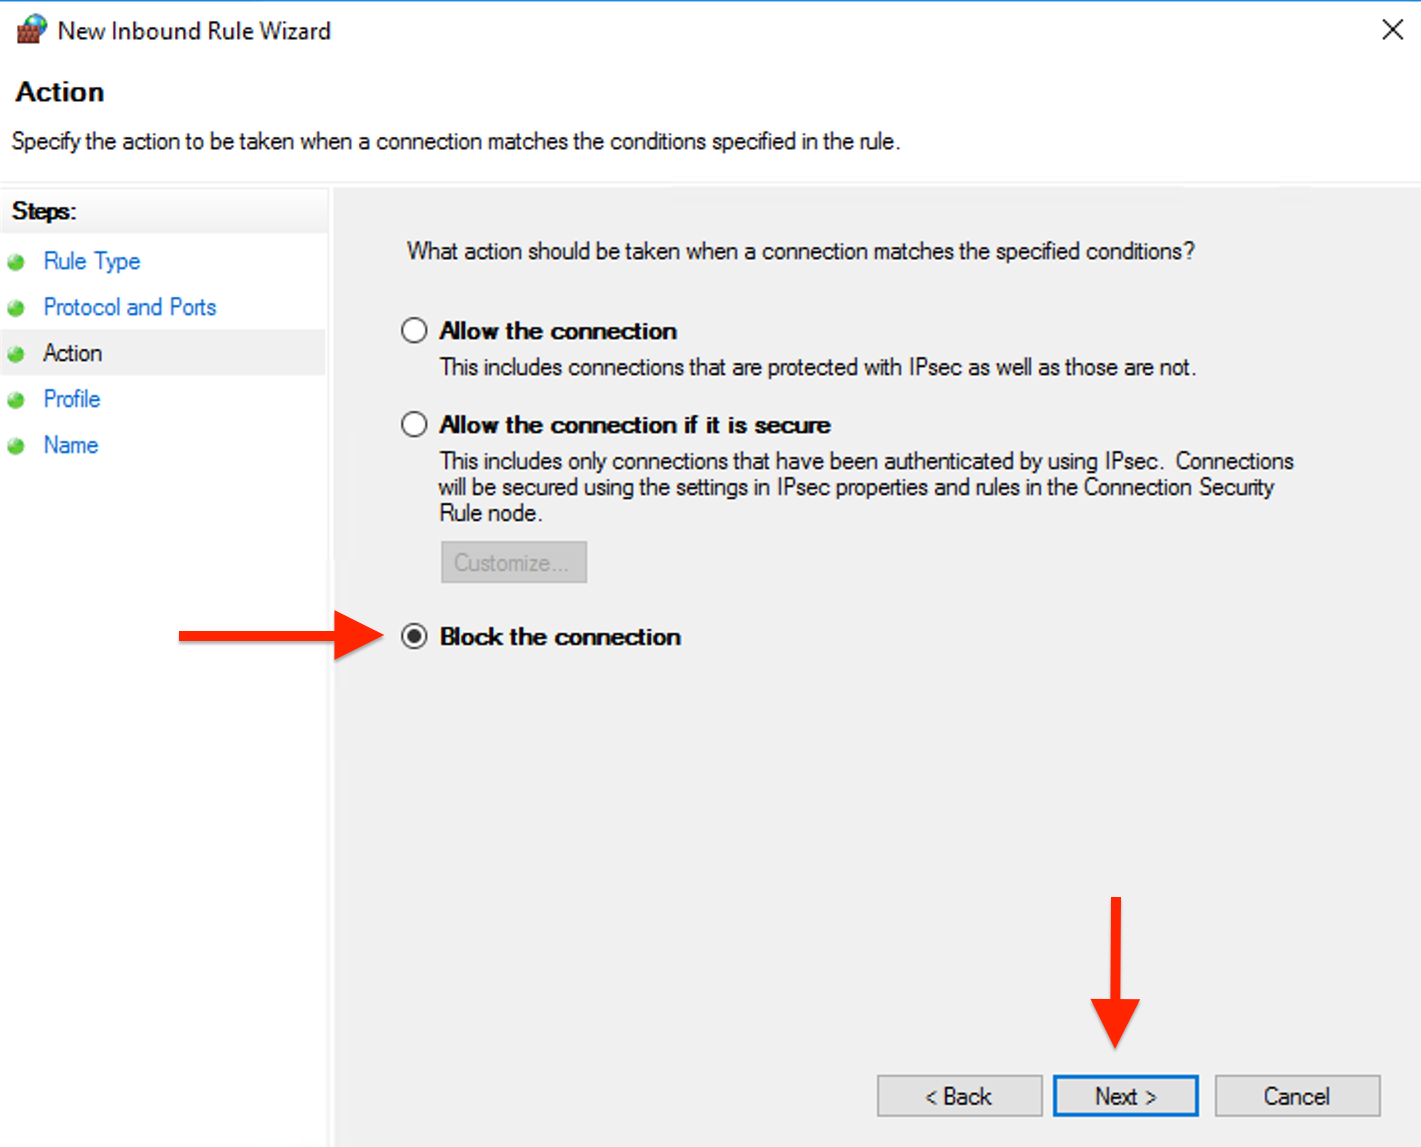
Select "Block the connection" and click "Next".
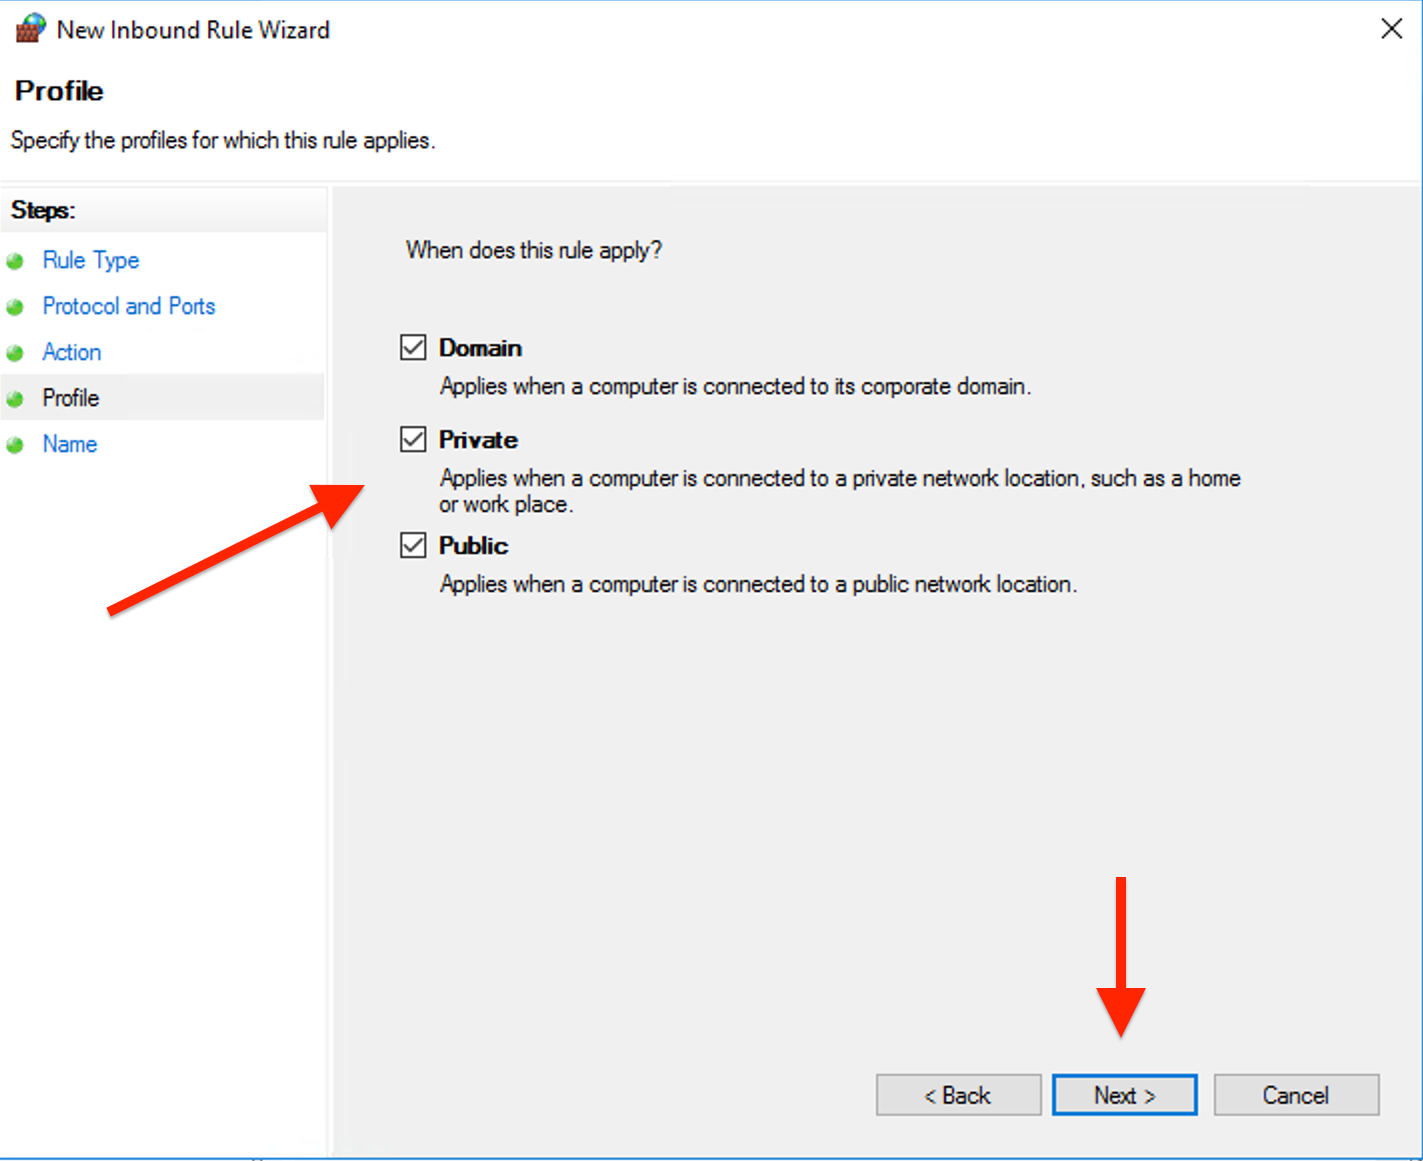
Select the network profiles (Domain, Private, Public) where the rule should apply and click "Next".
Specify a name for the rule and click "Finish".
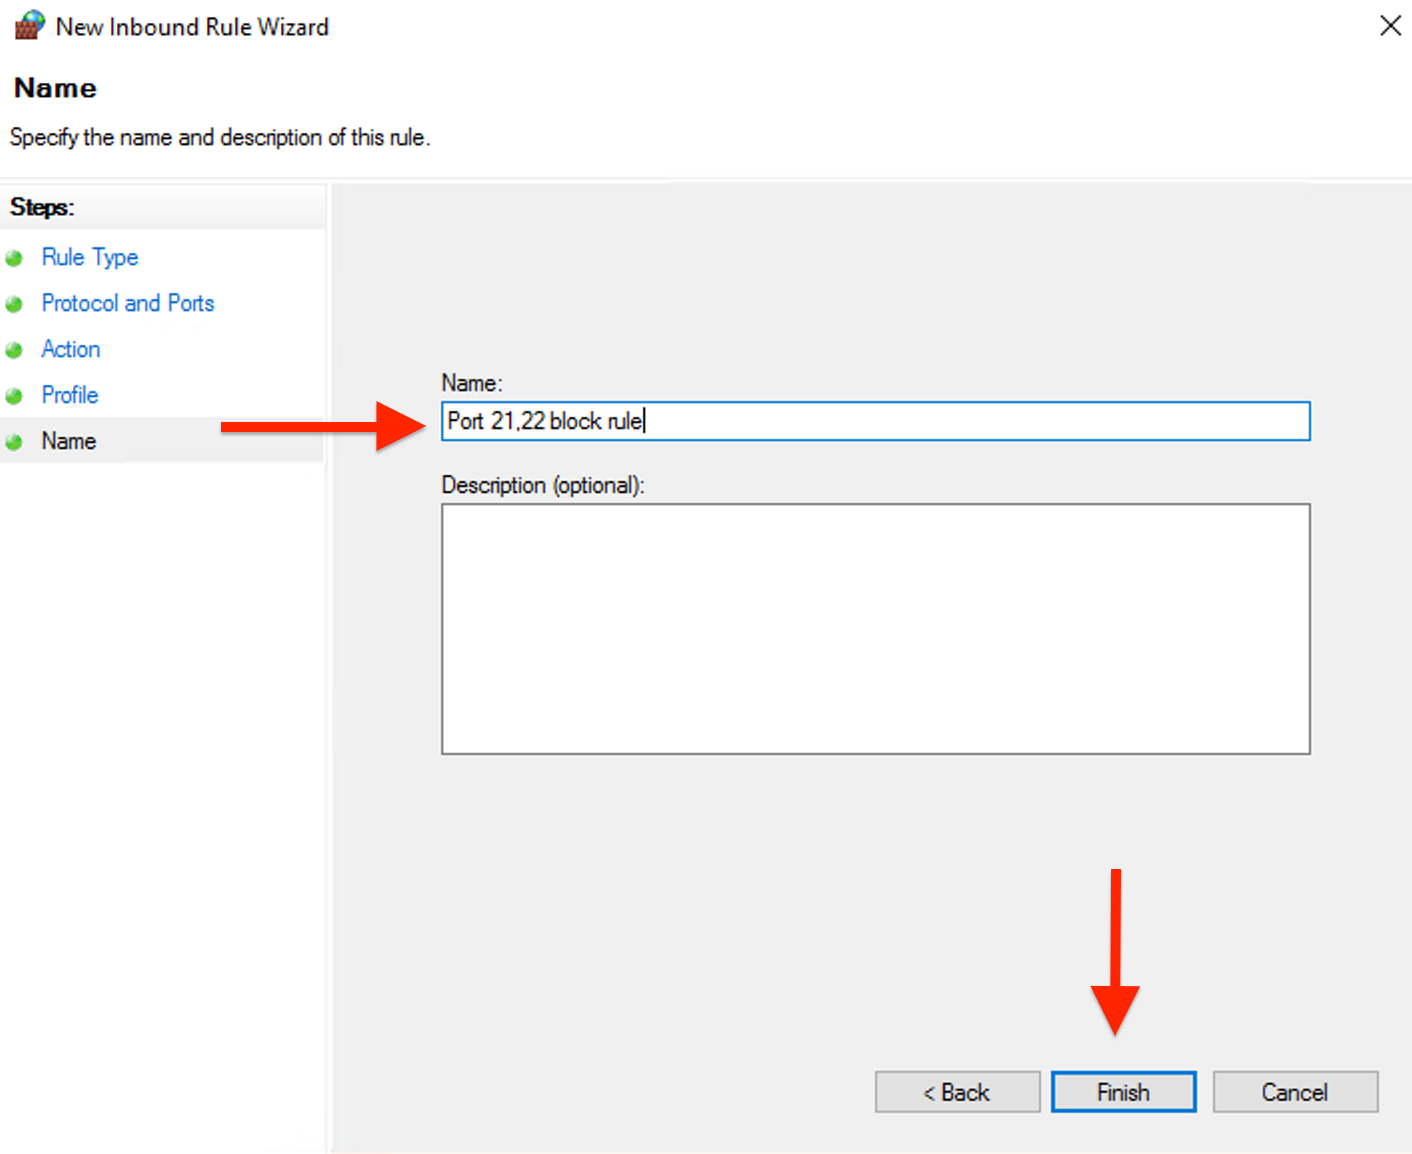
Done, Now ports 21,22 are blocked.
