
How to change DNS servers on Windows?
Looking to change DNS or edit DNS server settings on your Windows PC? Whether you’re aiming to boost your internet speed, increase security, or bypass restrictions, adjusting your DNS server can make a big difference. In this guide, we’ll show you how to change DNS server settings efficiently, providing clear steps to change DNS in Windows 10. From configuring DNS settings to using tools for a DNS changer in Windows, we’ll cover everything you need to know. Follow our instructions to quickly change DNS and enhance your network performance with ease.
Method 1: Using GUI.
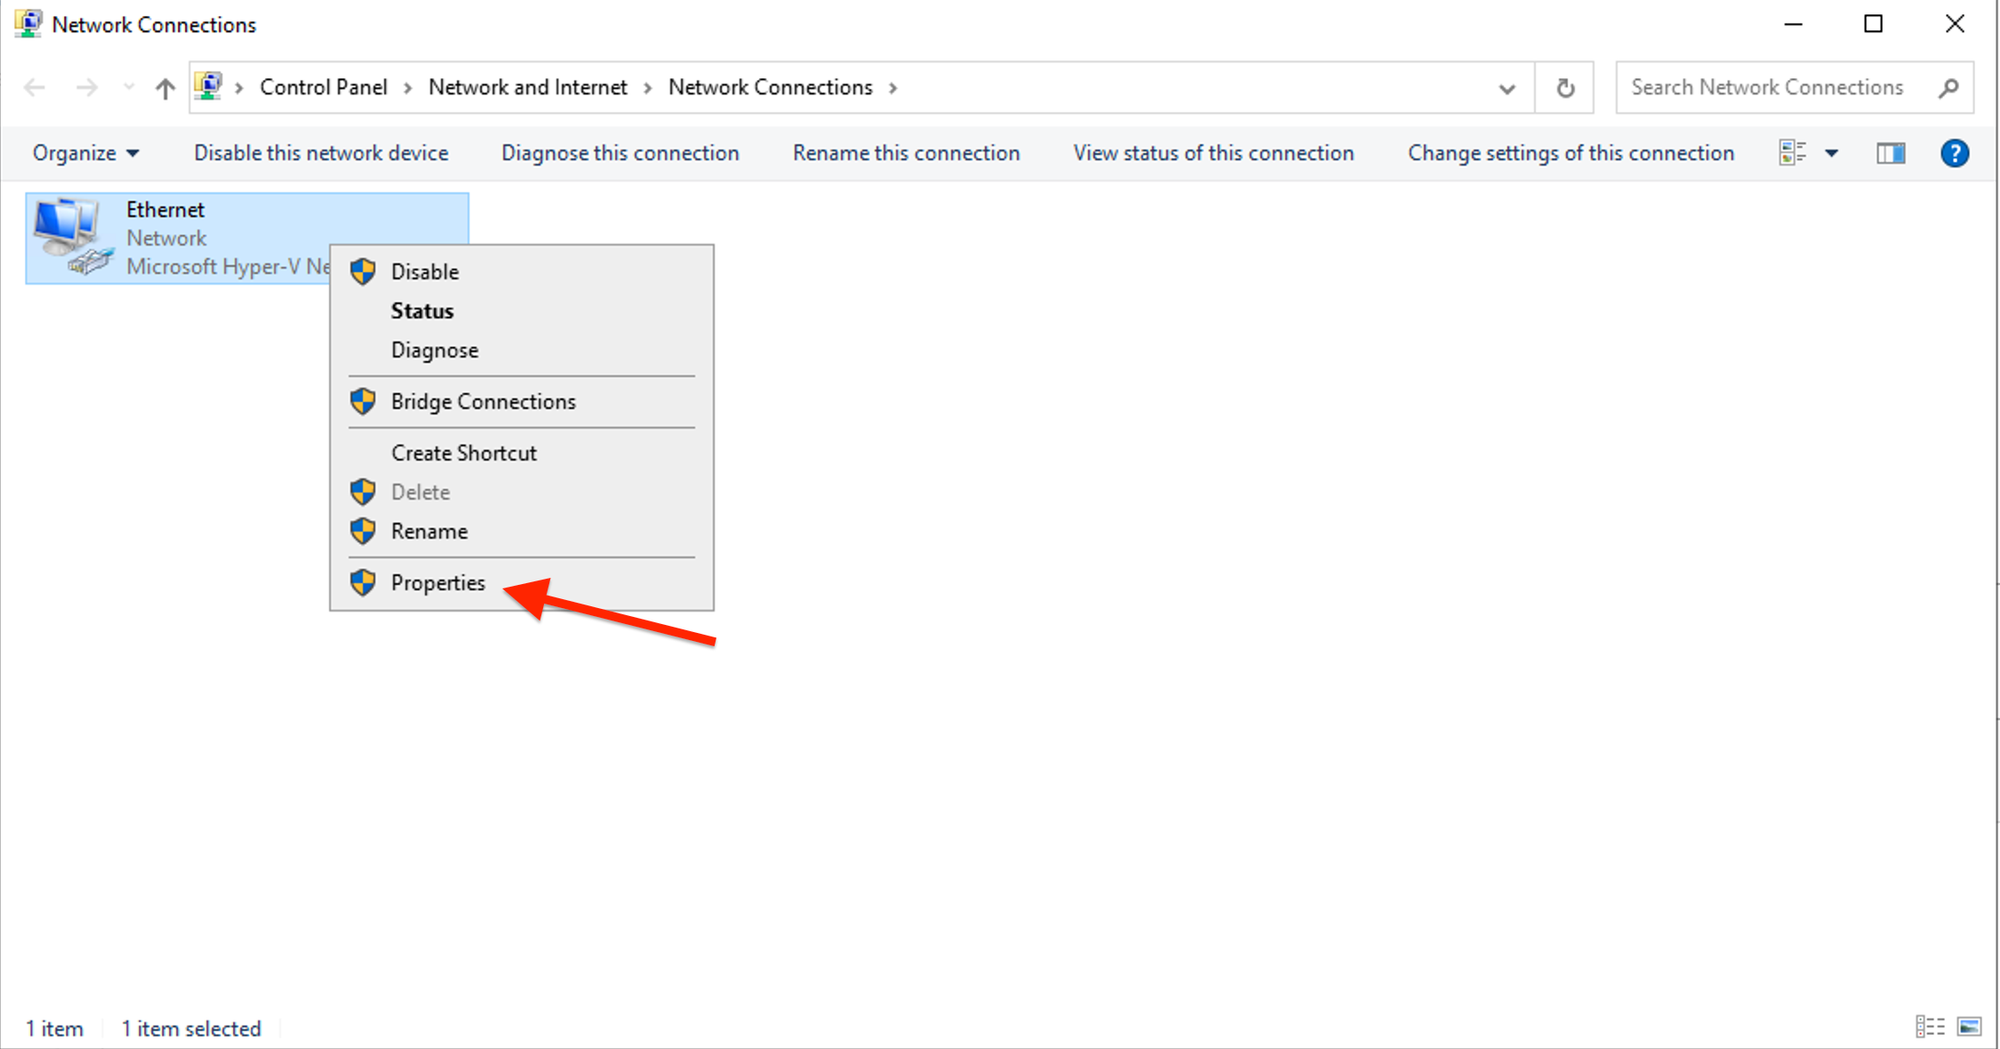
Press Win + R, type ncpa.cpl, and press Enter. This opens the Network Connections window.

Find the network adapter for which you want to change the DNS settings. This is usually labeled as "Ethernet" or similar and Right-click on the adapter and select Properties.
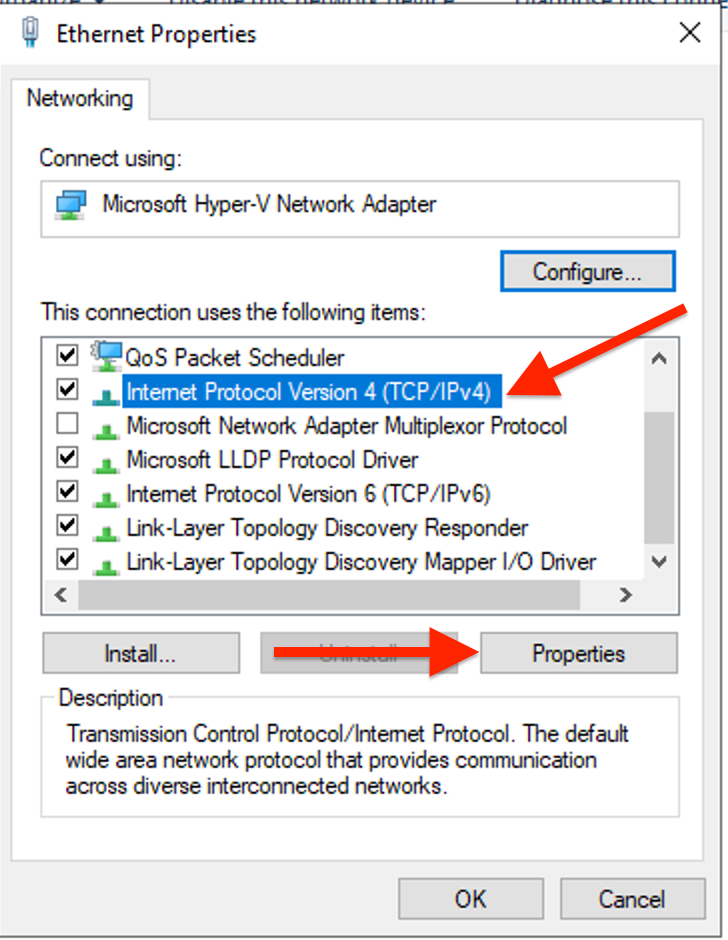
In the Properties window, scroll down and select Internet Protocol Version 4 (TCP/IPv4), then click Properties.
In the next window, select Use the following DNS server addresses. Enter the preferred DNS server address in the Preferred DNS server field.
Enter the alternate DNS server address in the Alternate DNS server field, if desired.
Now, click OK to save the changes.

Click Close on the network adapter properties window.
ipconfig /flushdns.Using Command-Line
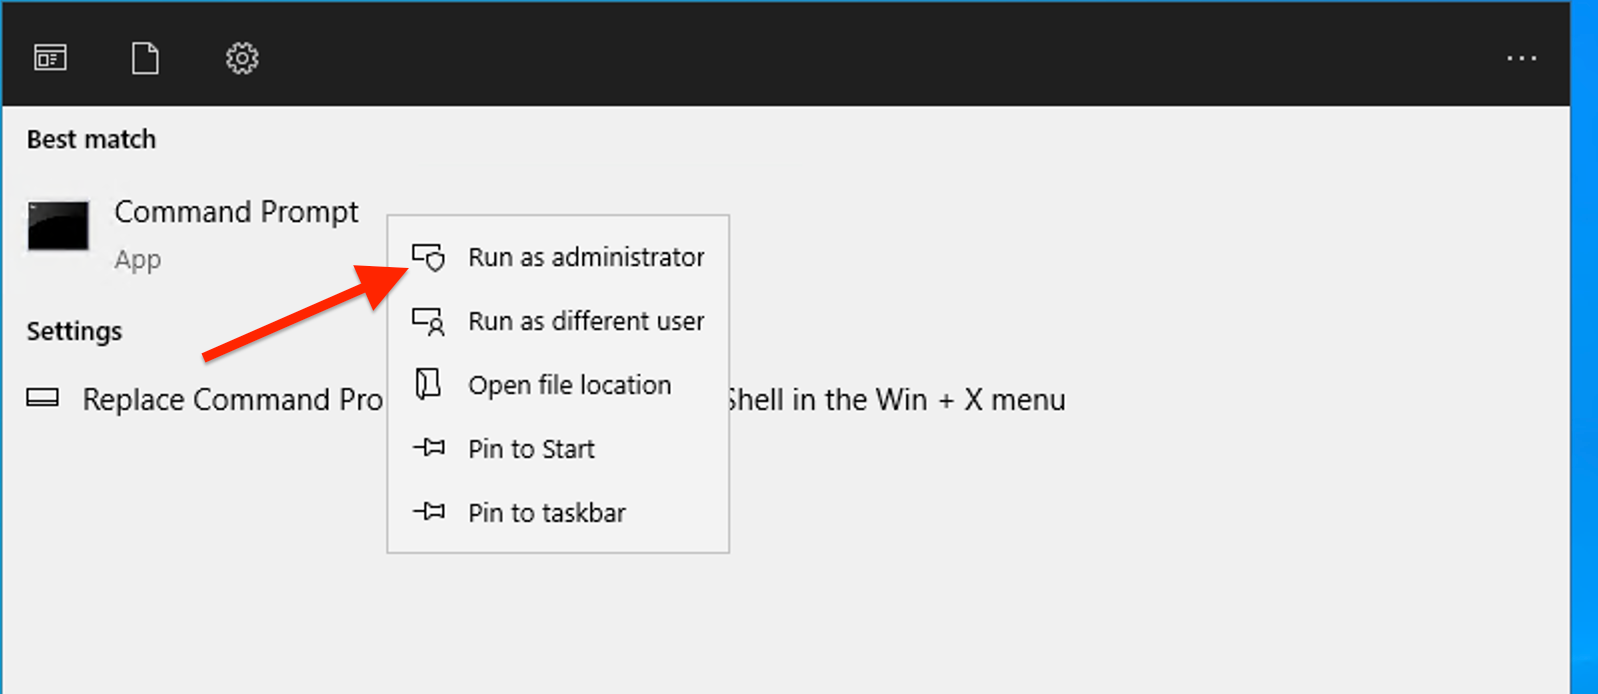
Type "cmd" in the Windows search box and Right-click "Command Prompt" and select "Run as administrator".
Type the following command and press Enter to list all network interfaces.
netsh interface ip show config
Now, use the following command to set the DNS servers:
netsh interface ip set dns name="Interface Name" static DNS_IP
Replace "Interface Name" with the name of your network interface (e.g., "Ethernet"), and DNS_IP with the DNS server address.
If you need to add an alternate DNS server, use:
netsh interface ip add dns name="Interface Name" DNS_IP index=2
