
How to change IPv4 IP Address on Windows?
Looking to change your IPv4 address? Whether you're managing a server or updating network settings, knowing how to change an IPv4 address is crucial for optimal performance and security. This guide will walk you through the process of changing your IPv4 address on Windows, making it simple and efficient to adjust your network configuration as needed.
For Windows Server 2016, 2019, and 2022
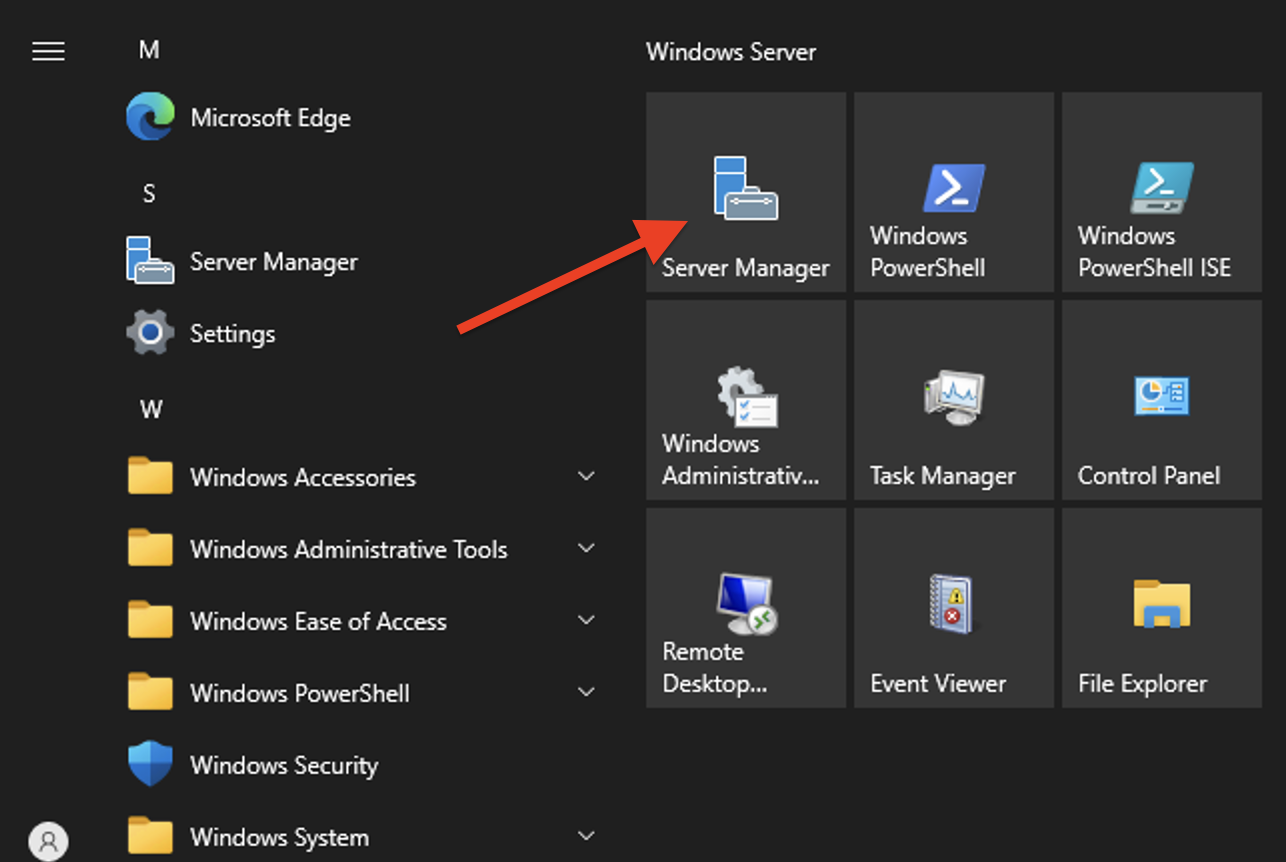
Click on the Server Manager icon on the taskbar or search for "Server Manager" in the Start menu.
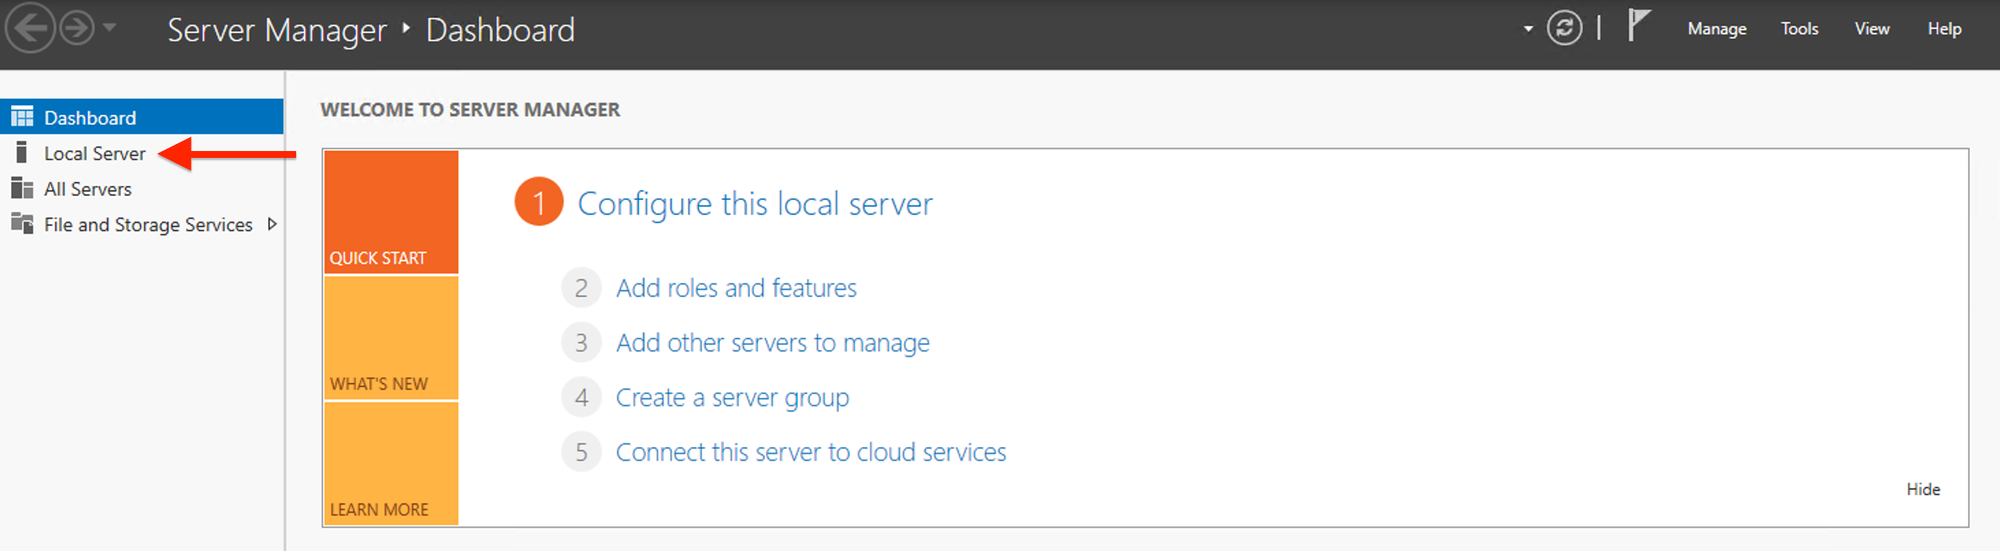
In the Server Manager window, click on Local Server in the left pane.
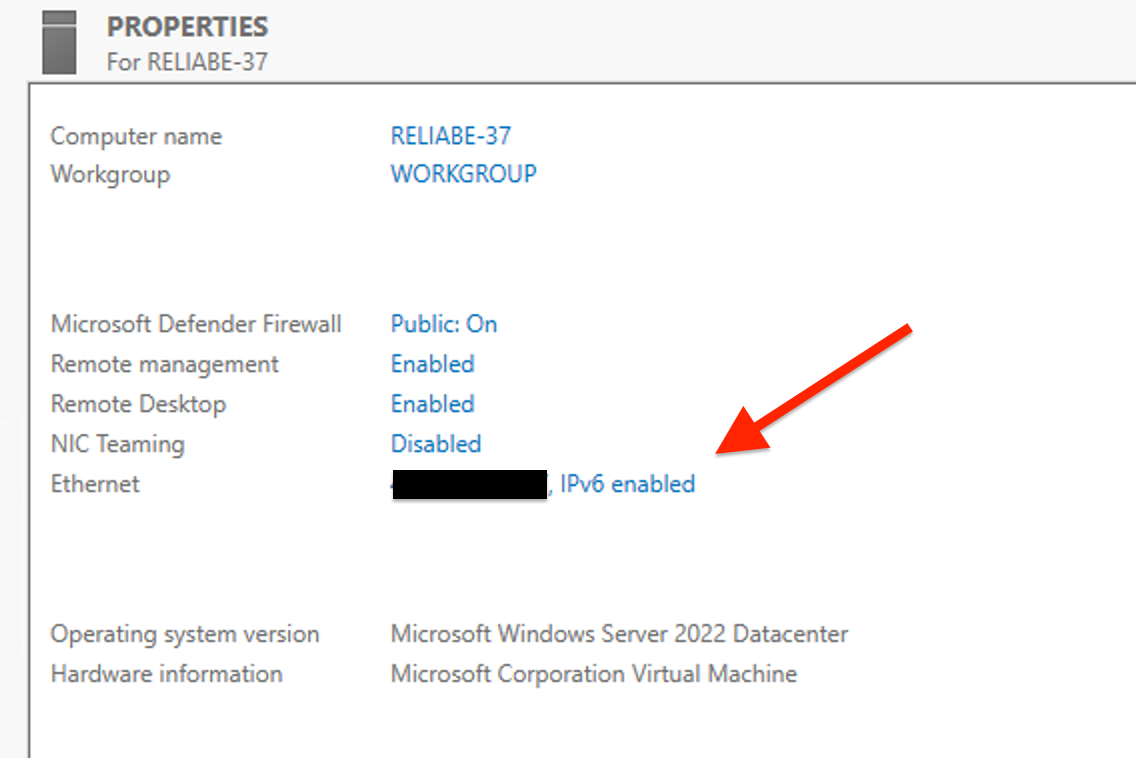
In the Properties section, locate the Ethernet or Network section Click on the network link “Ethernet”.
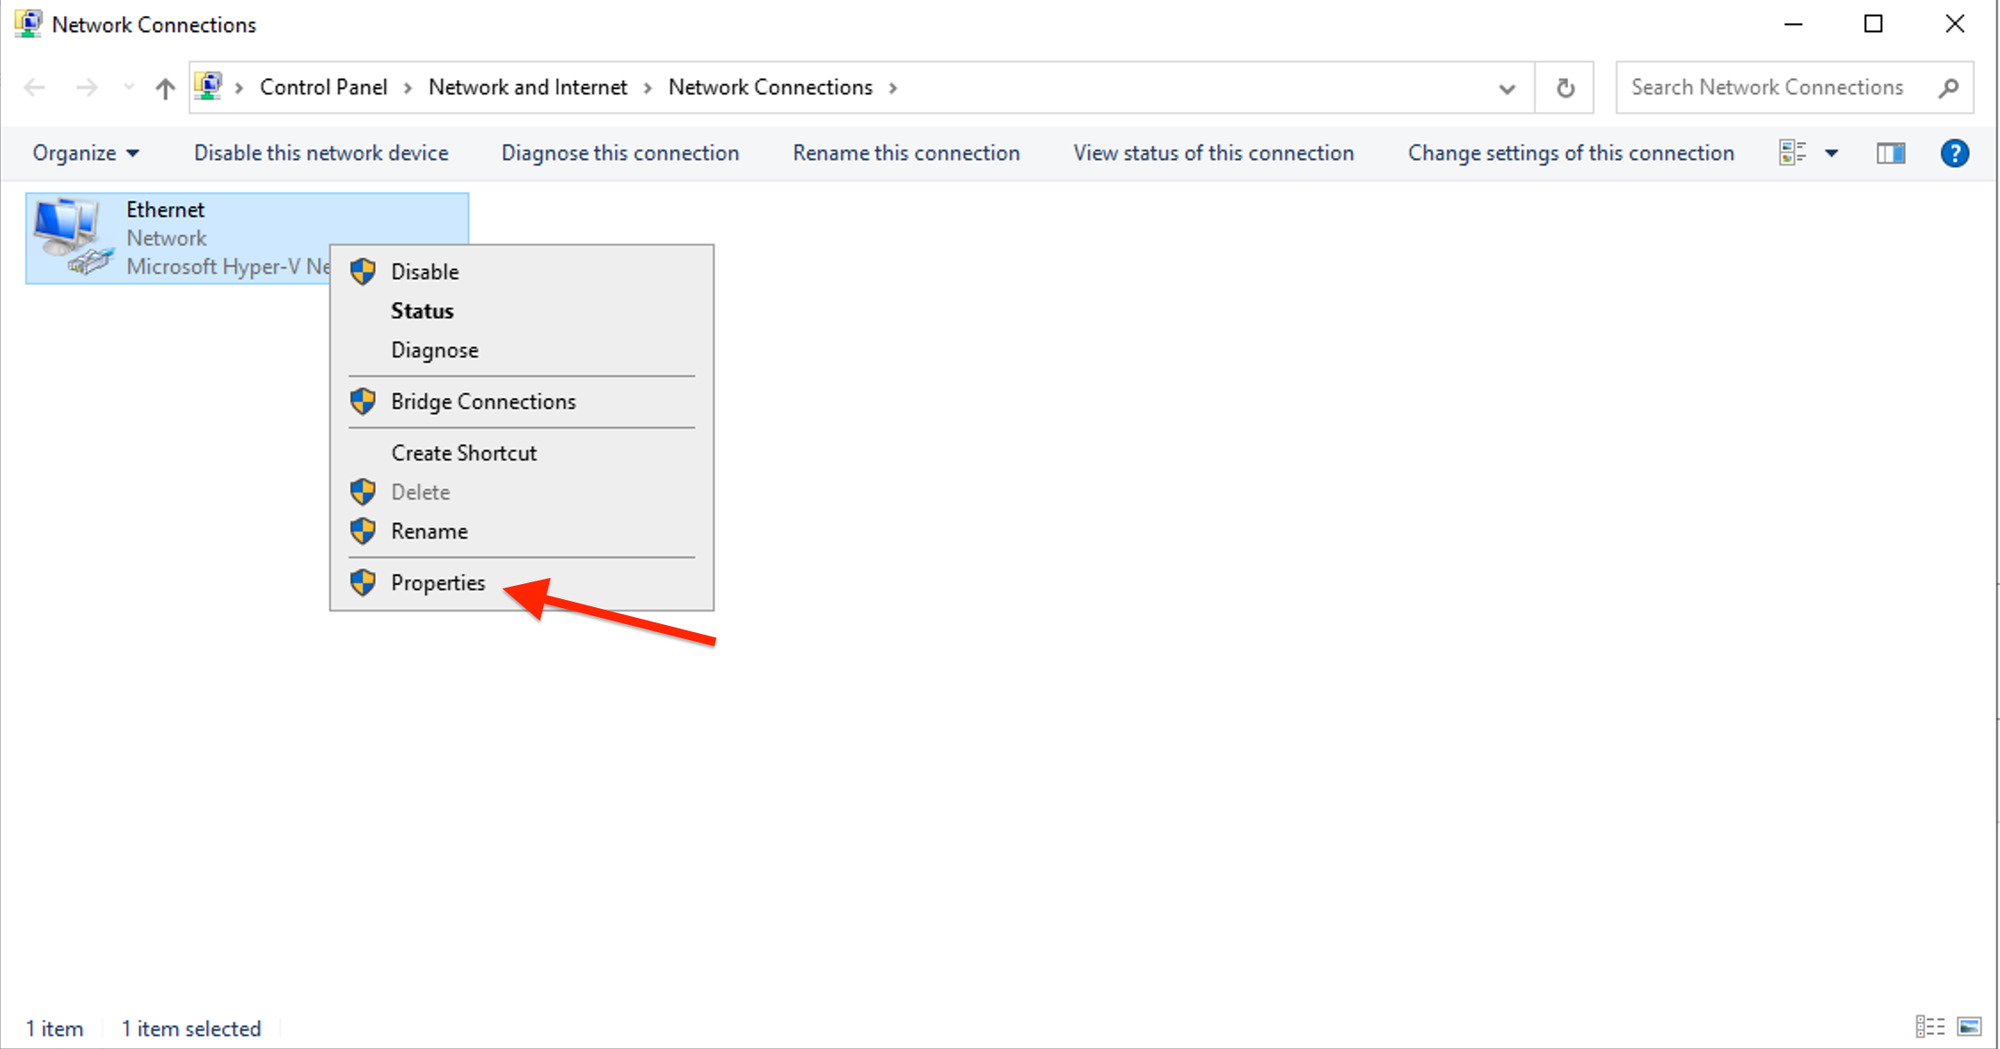
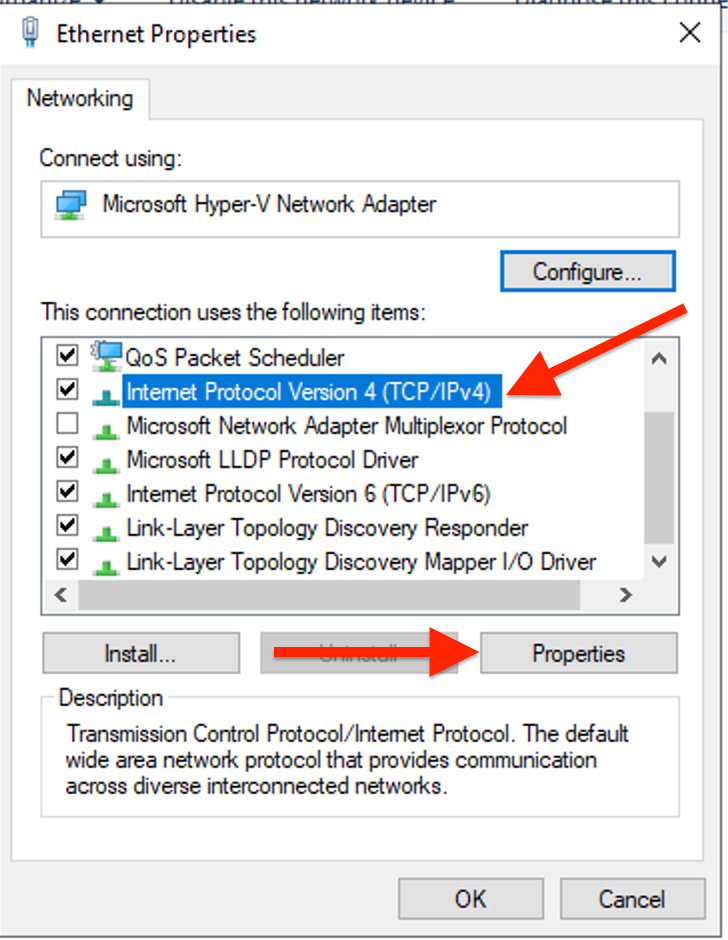
This will open the Network Connections window, Right-click on the network adapter you want to change and select Properties.
In the This connection uses the following items list, find and select Internet Protocol Version 4 (TCP/IPv4) and click Properties.
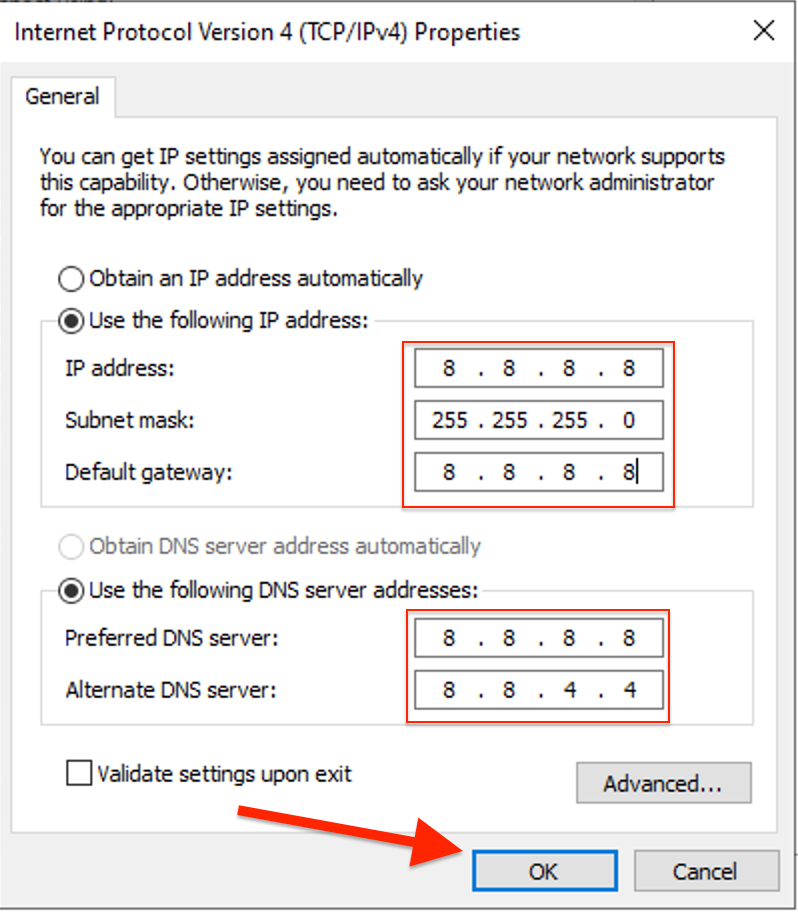
If you want to assign a static IP address, select Use the following IP address and enter the new IP address, Subnet mask, and Default gateway. You may also need to enter DNS server addresses. Finally, click OK to apply the settings.
Close all open windows. Restarting your server is required for the changes to take effect.
