
How to enable a port in Windows firewall?
Opening a port in Windows Firewall is crucial for allowing applications or services to communicate through your system. This guide will quickly show you how to enable ports to ensure smooth operation and connectivity.
Press "Win + R" type "control" and press Enter to open the Control Panel.
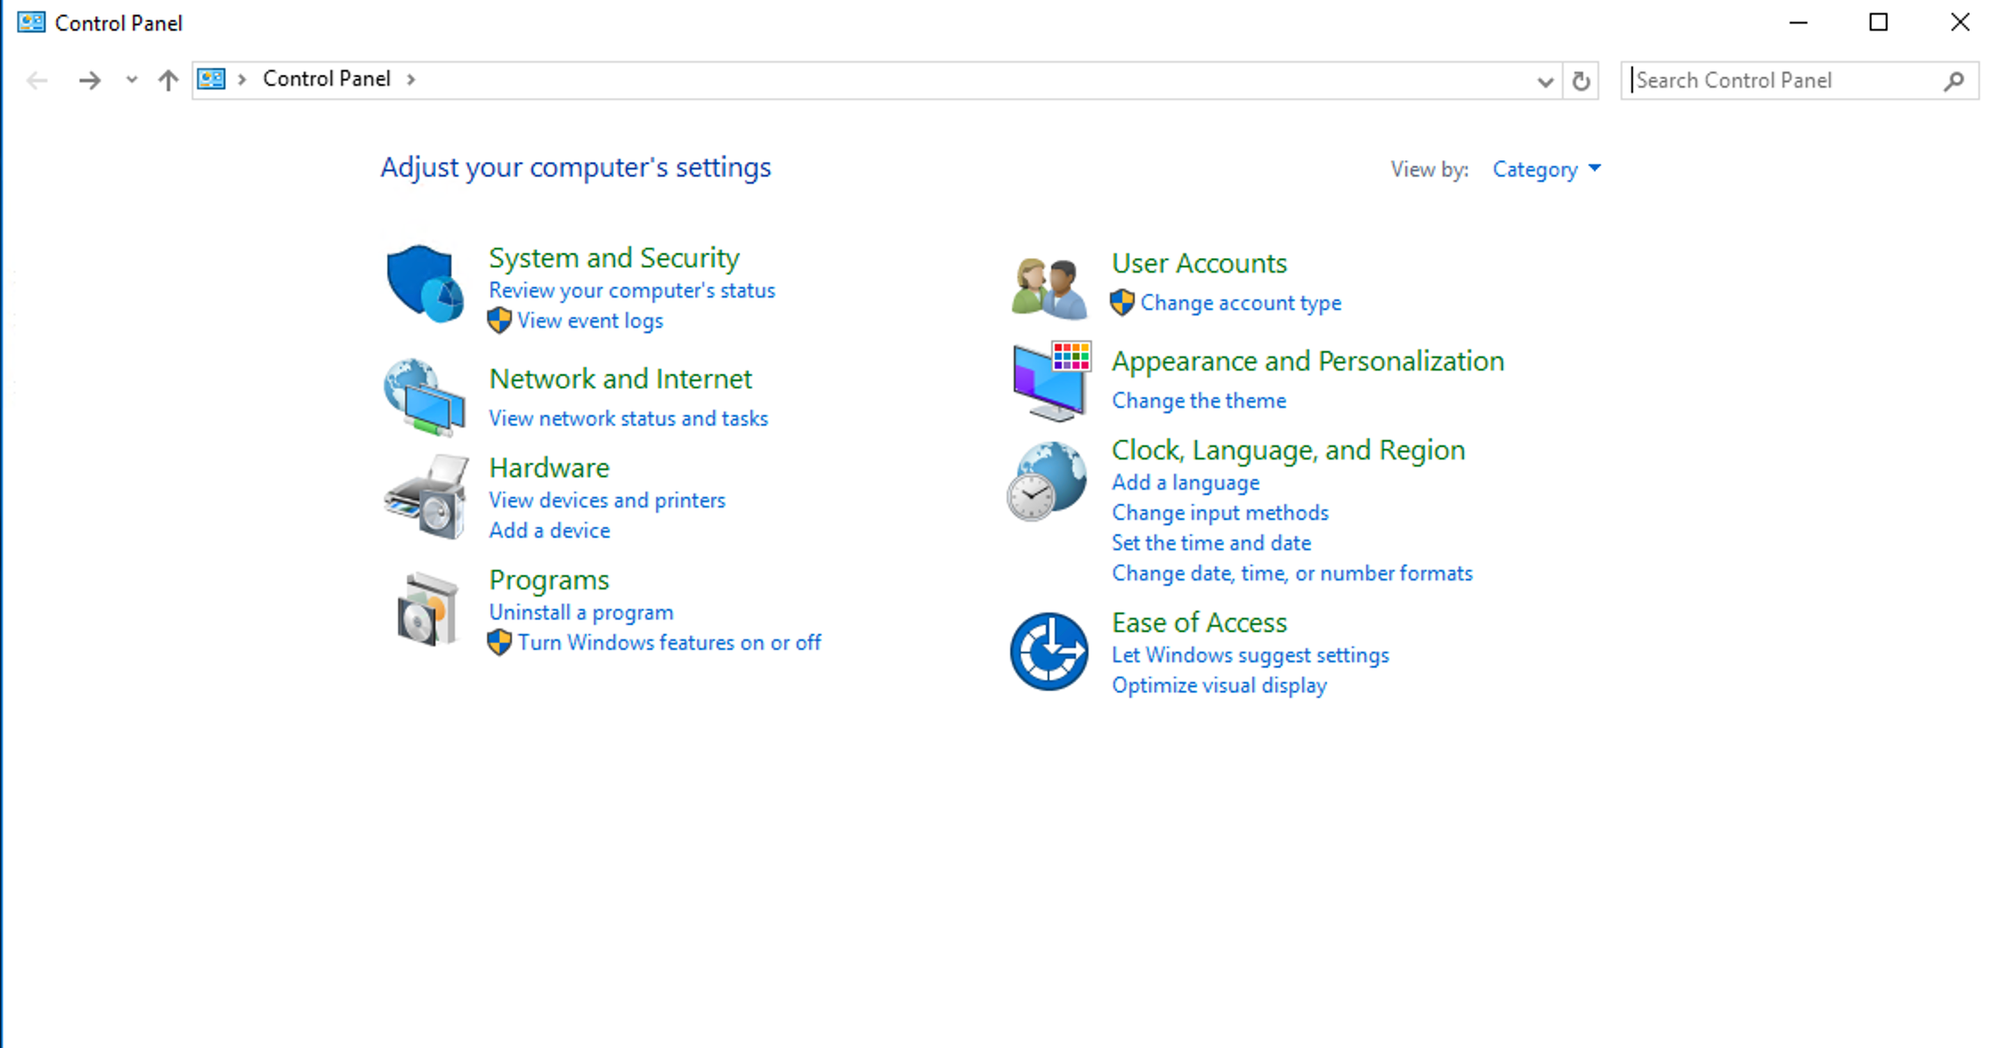
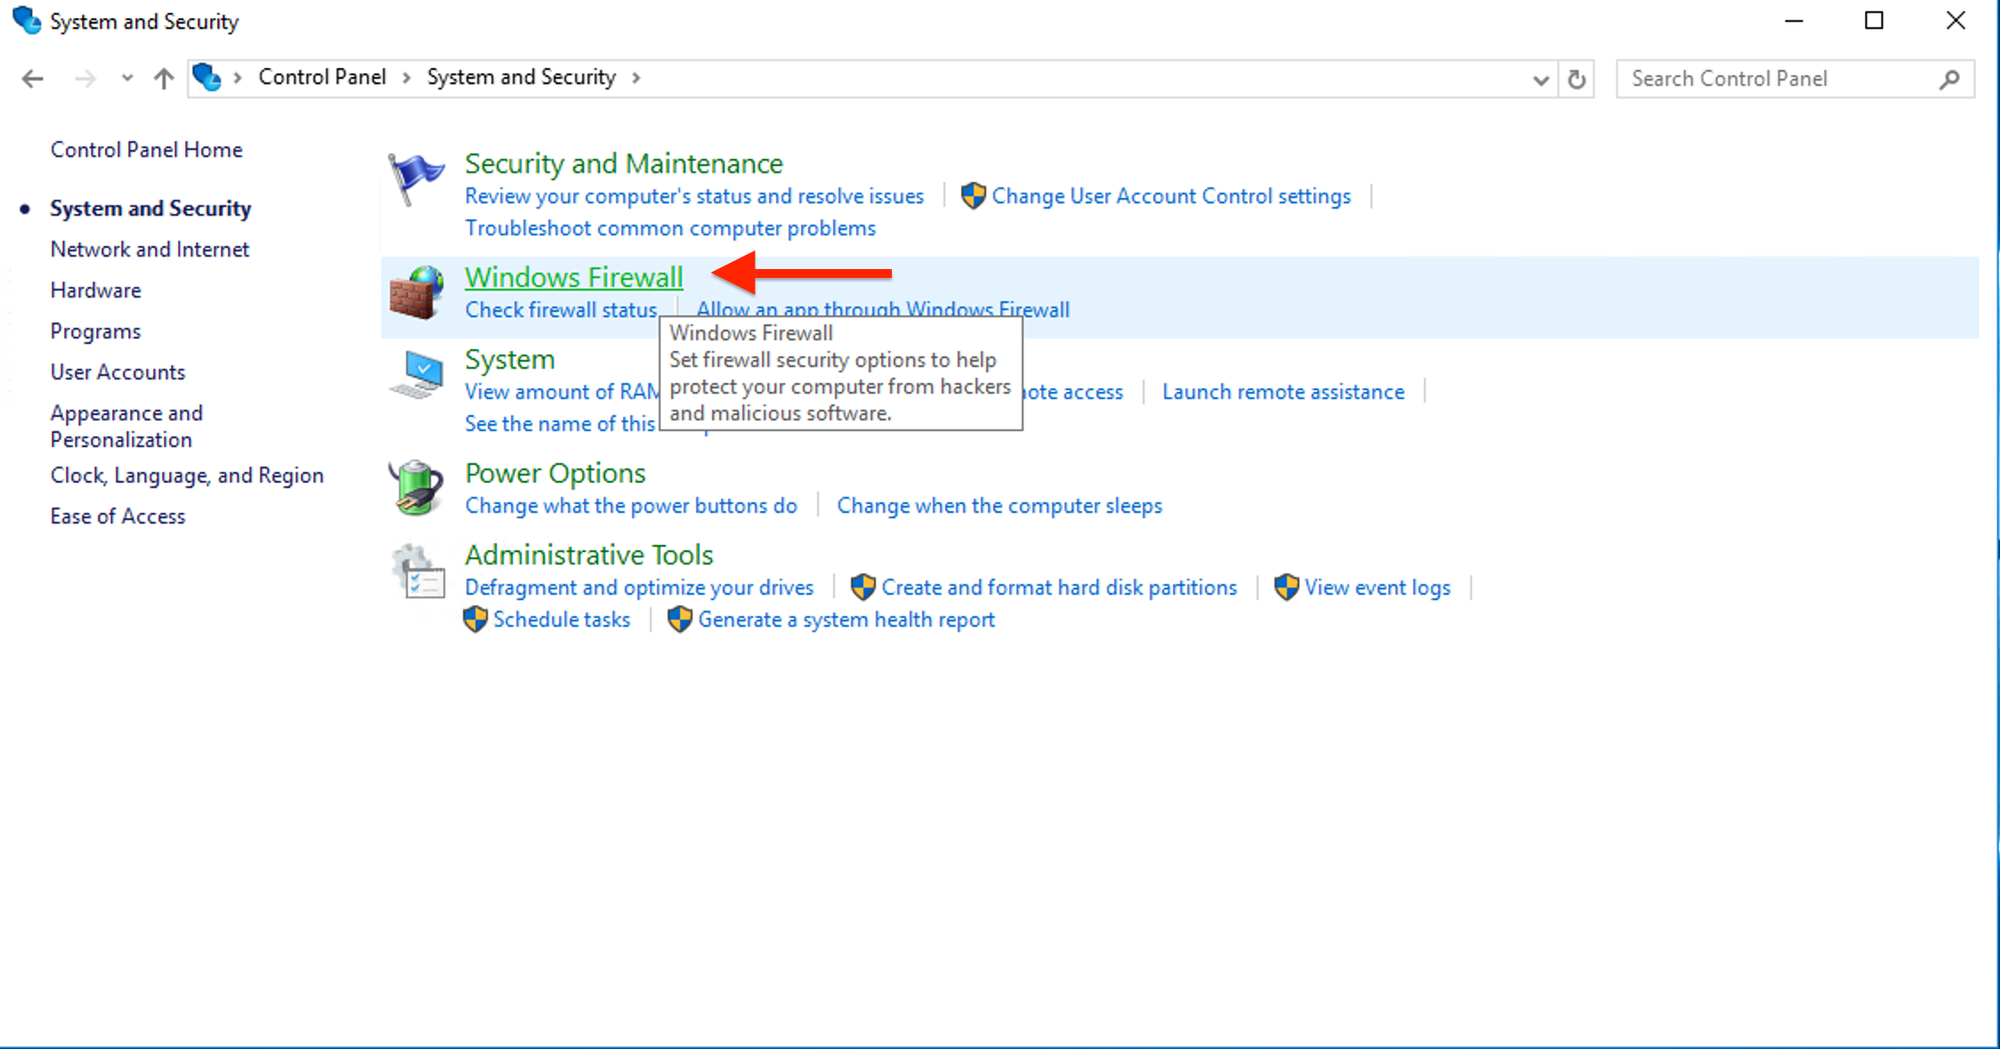
Navigate to "System and Security" > "Windows Defender Firewall".
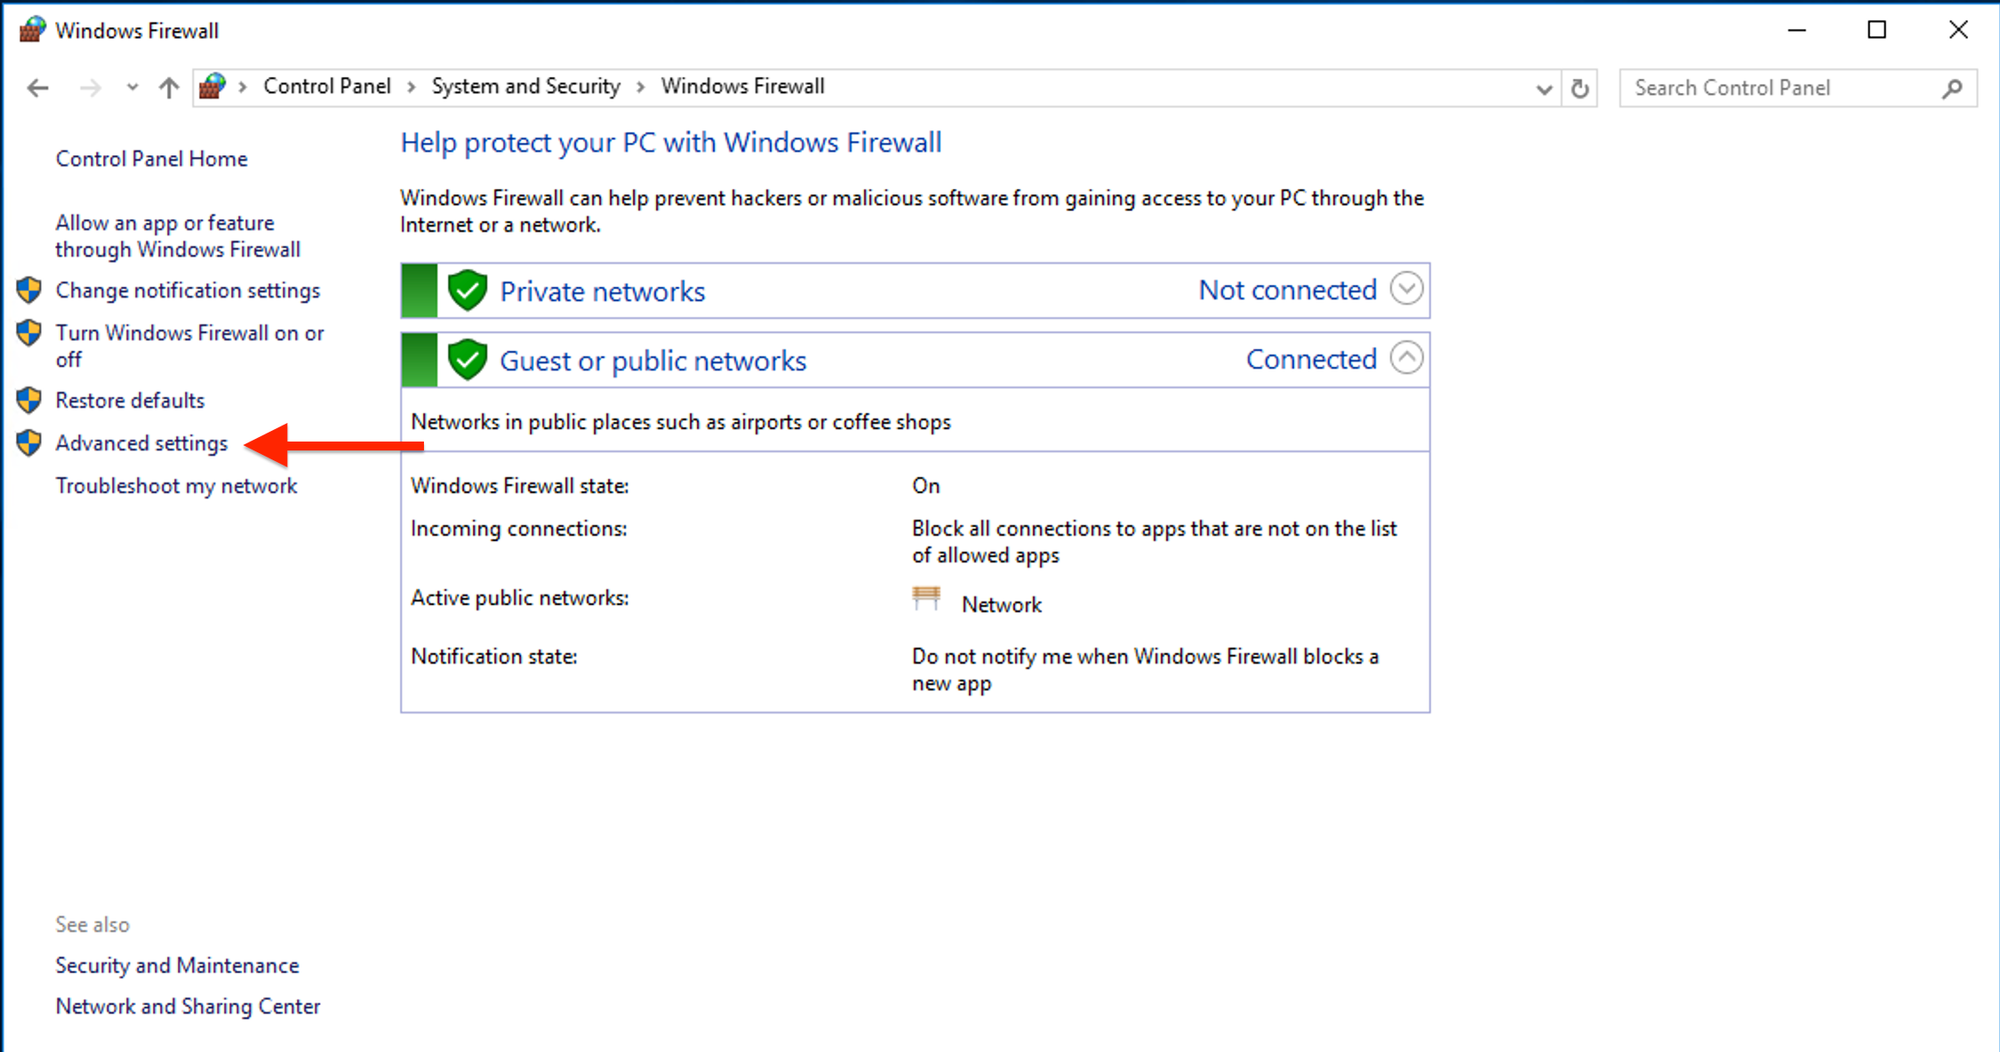
In the Windows Defender Firewall window, click on "Advanced settings" on the left.
In the "Windows Defender Firewall with Advanced Security" window, select "Inbound Rules" on the left.
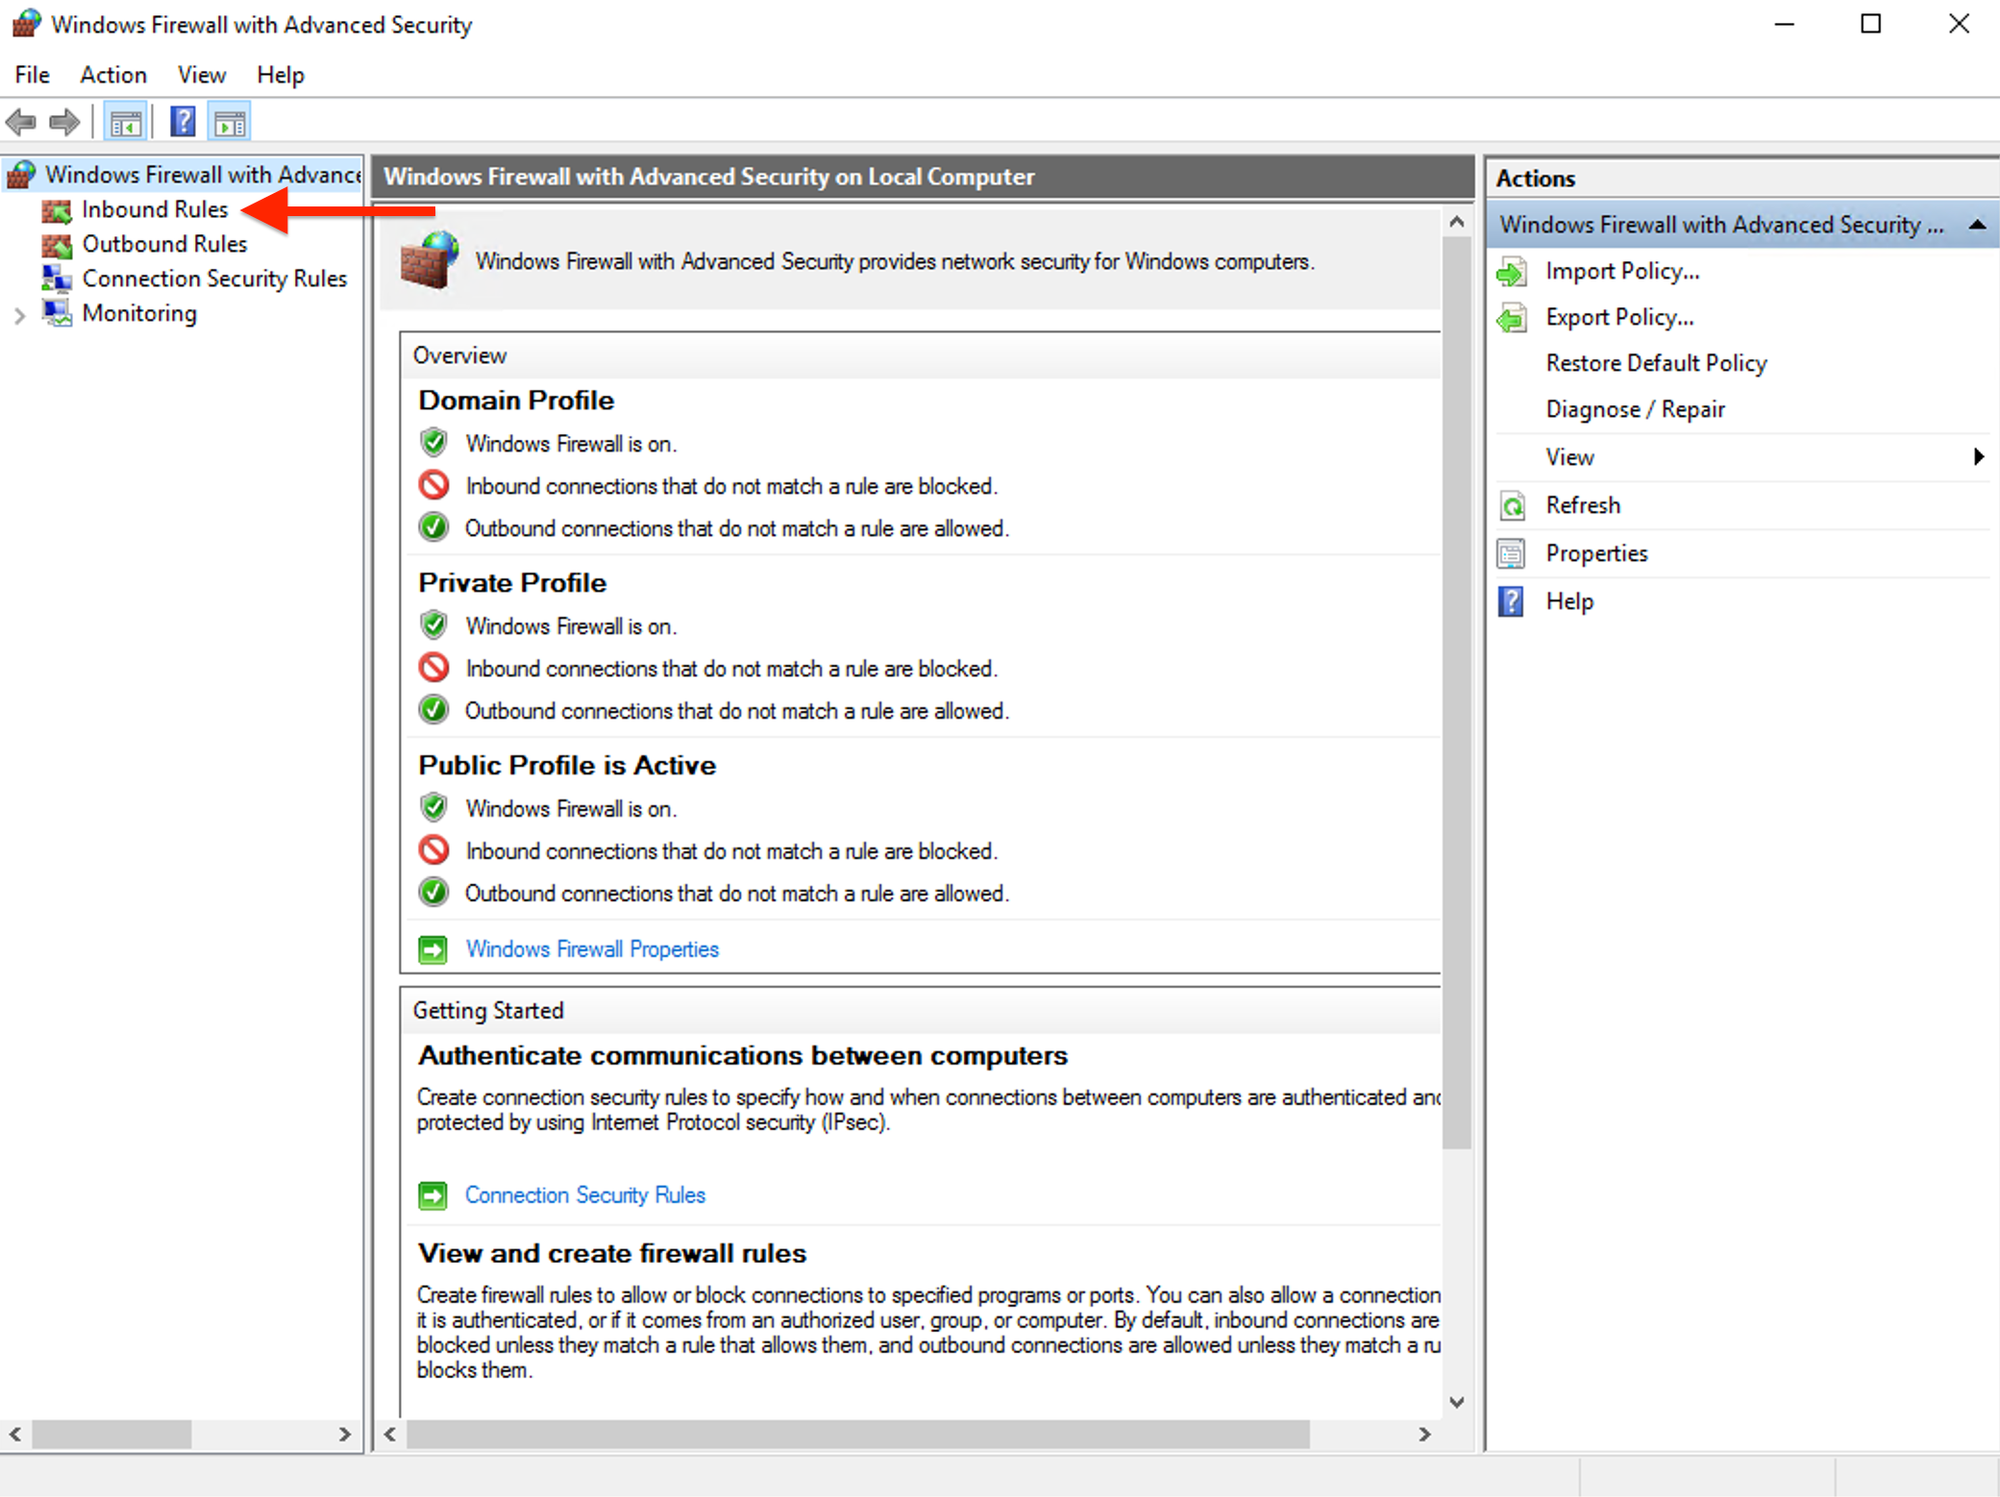
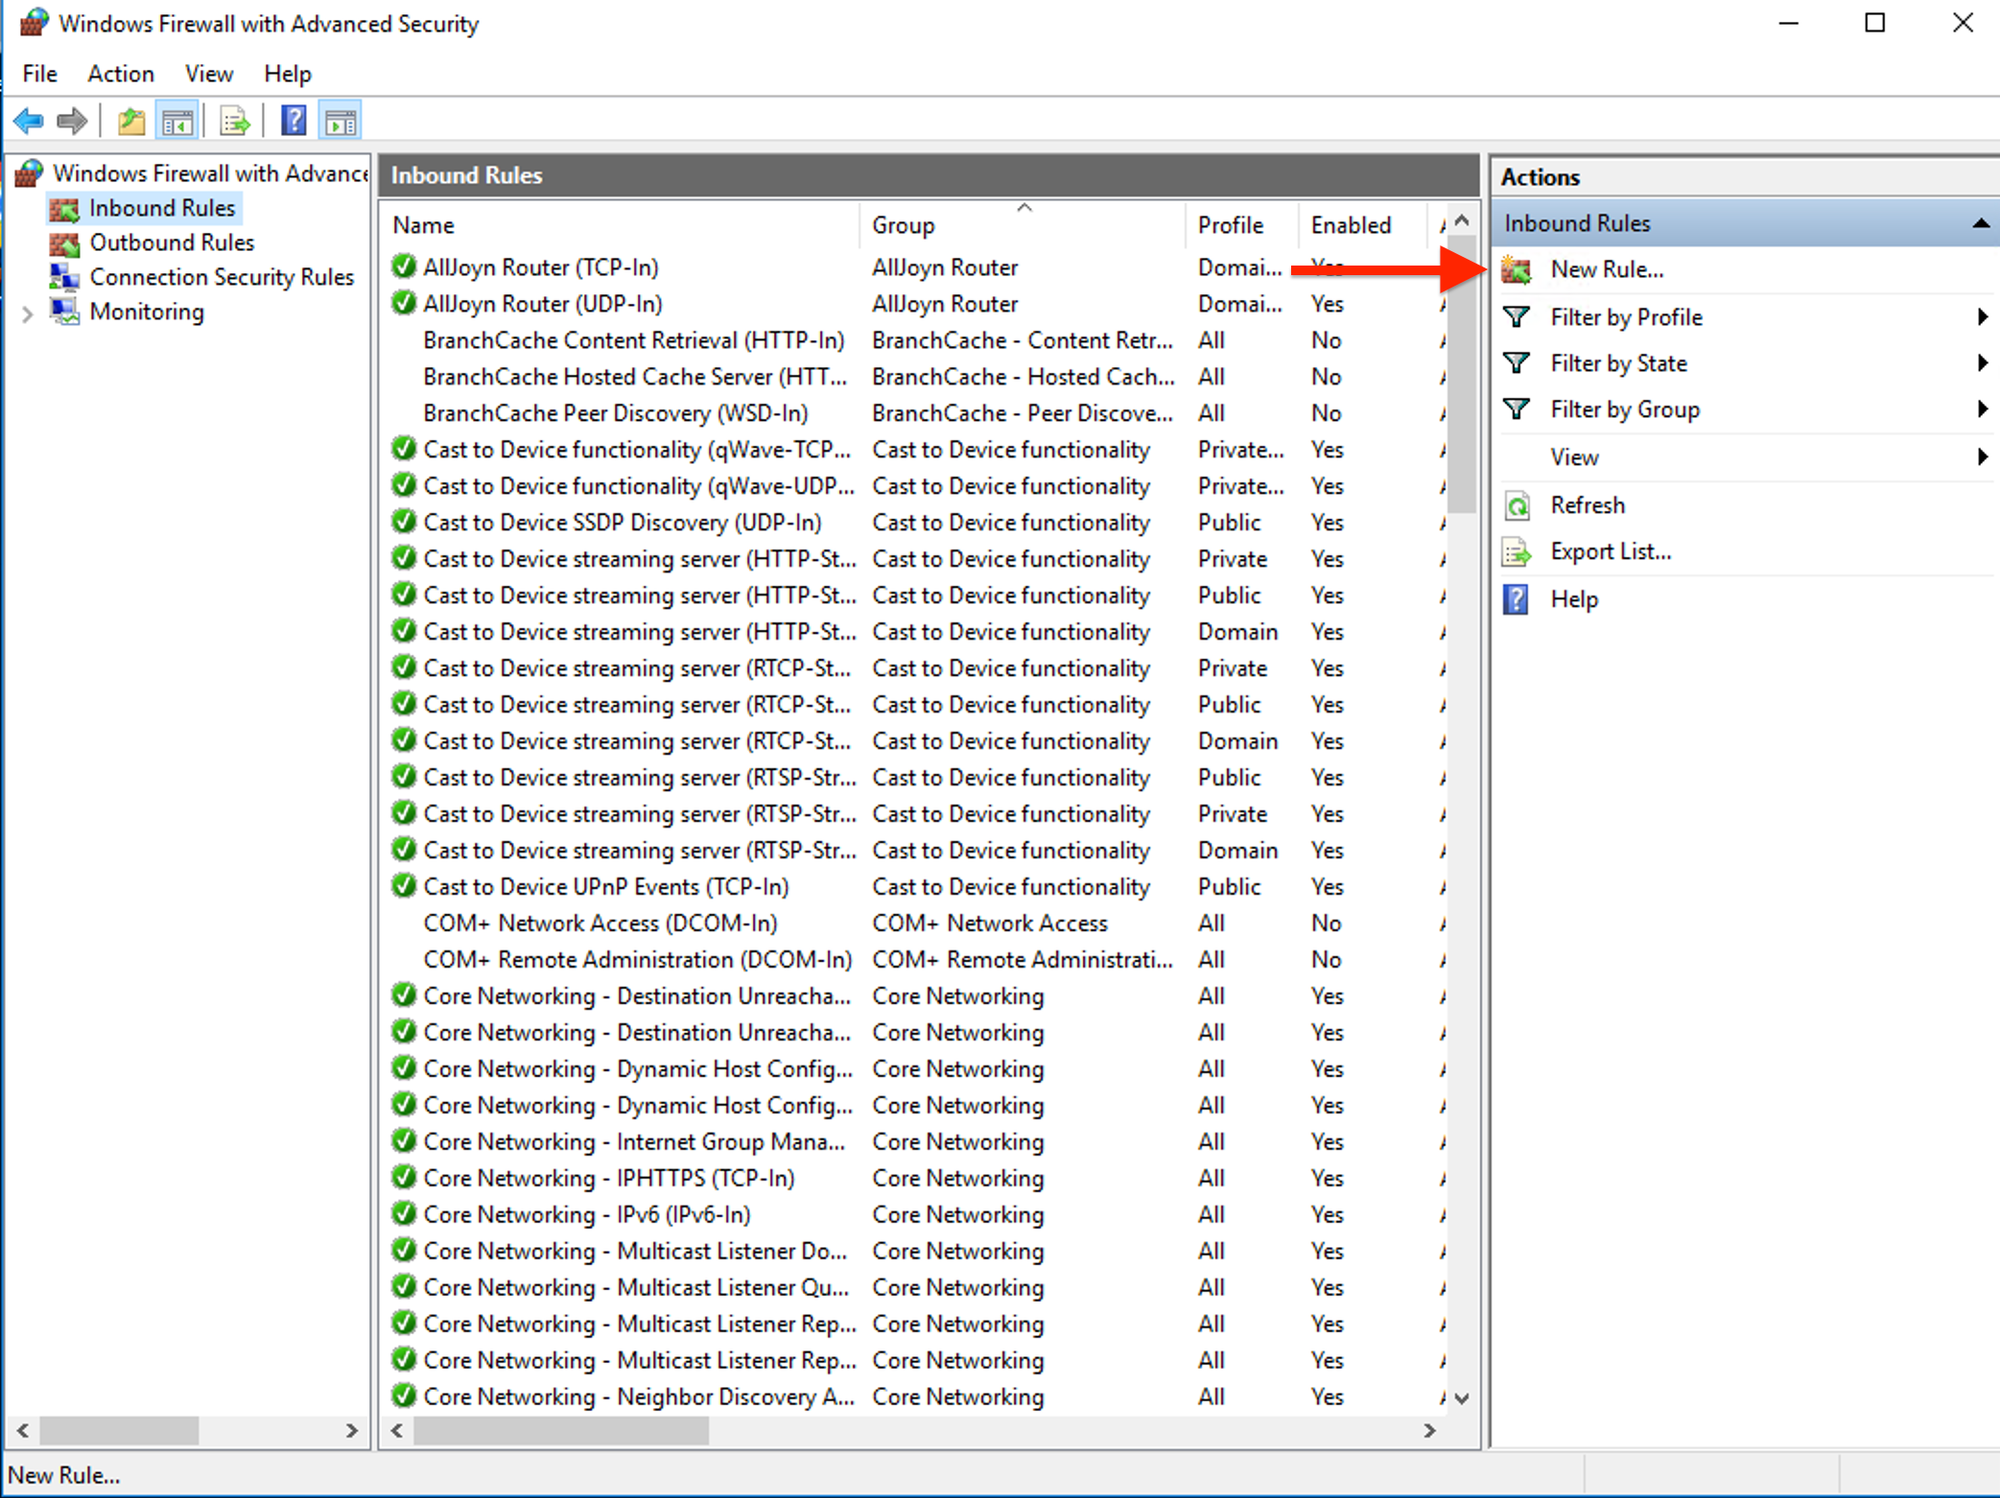
Click "New Rule" on the right pane.
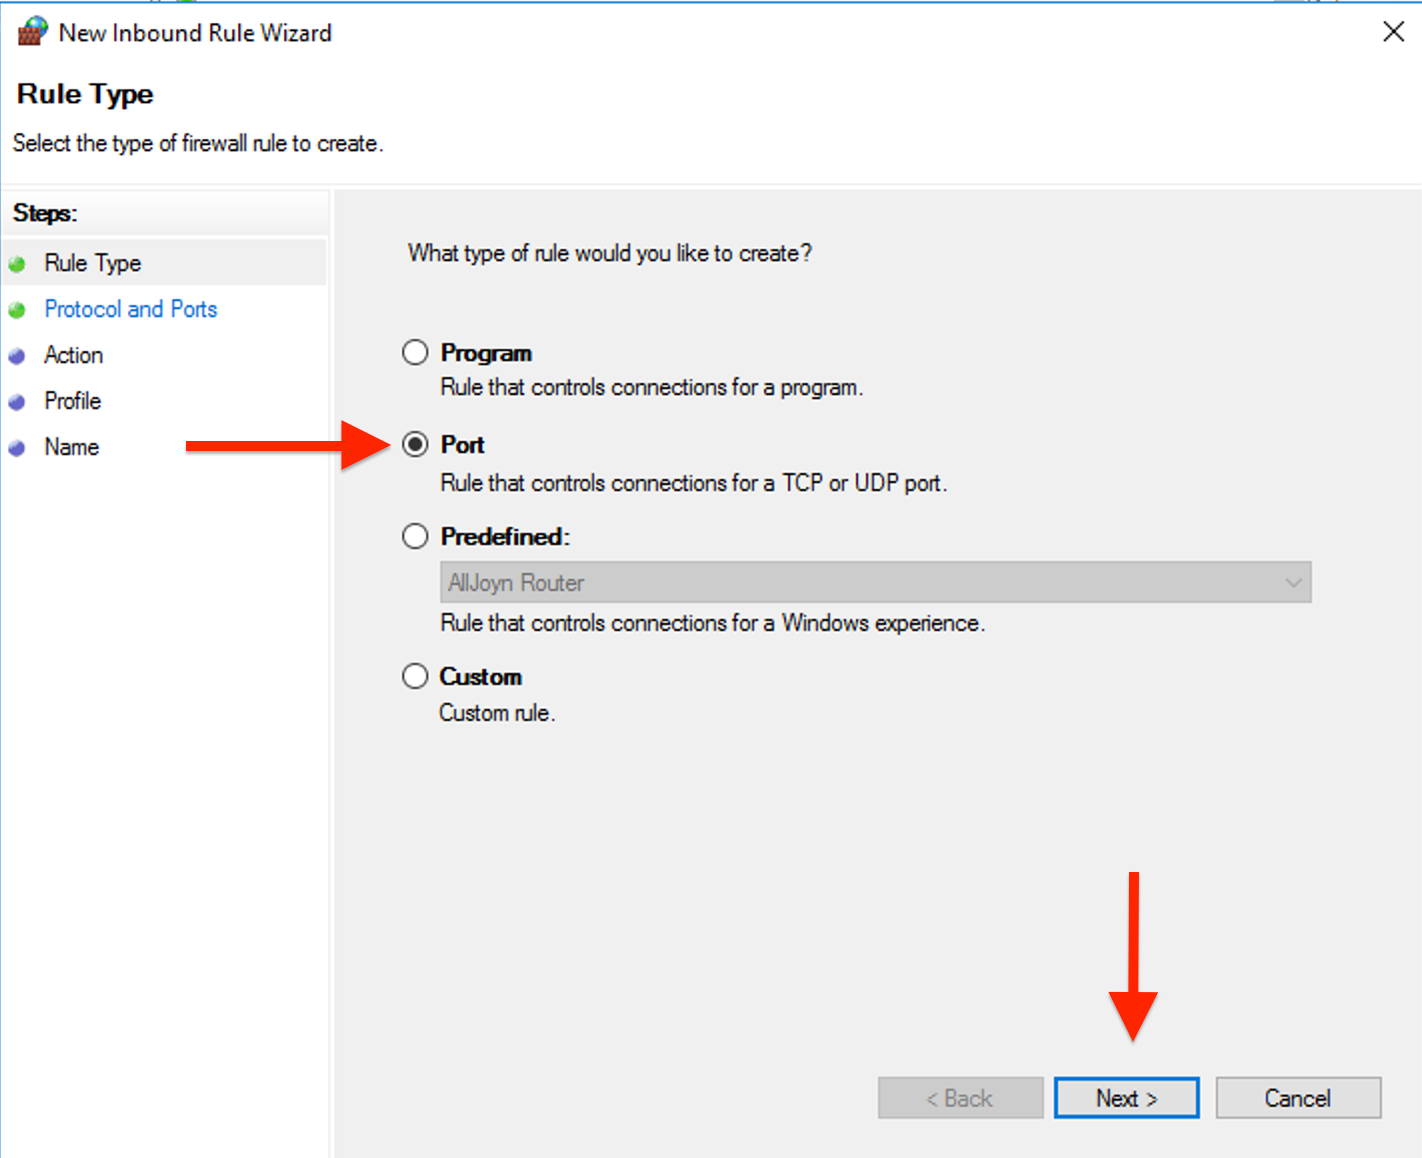
Choose "Port" and click "Next".
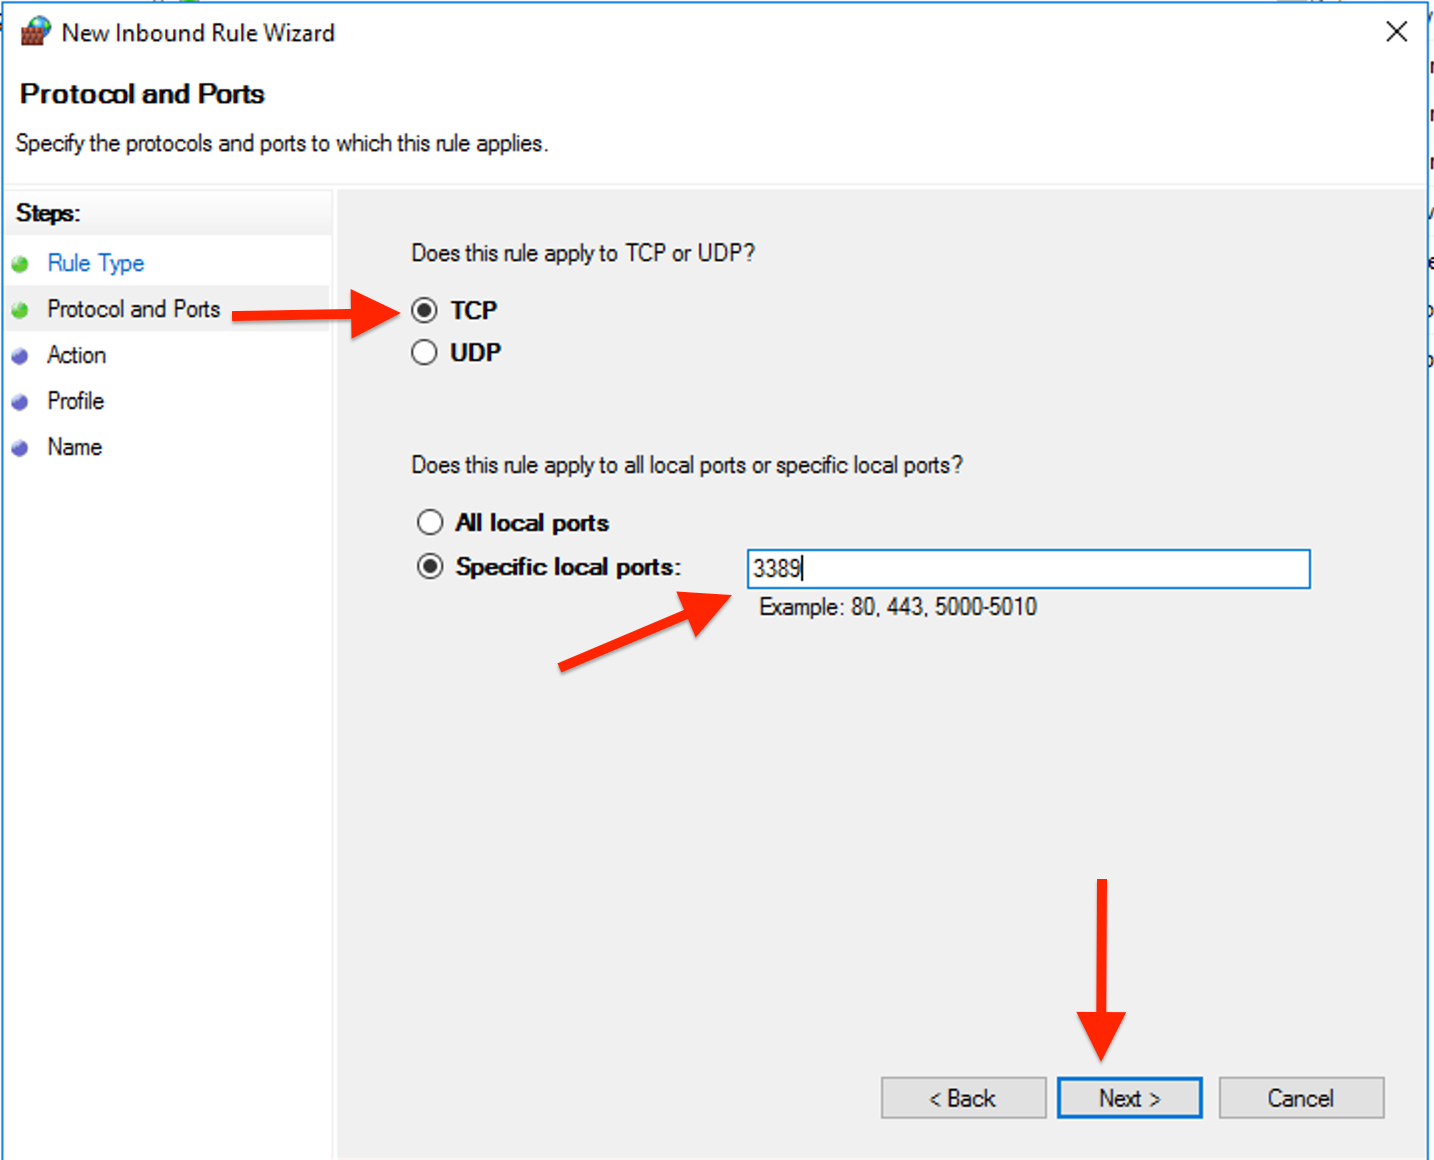
Select "TCP" and specify the port number. The default RDP port is 3389. Enter "3389" in the "Specific local ports" field. Then, click "Next".
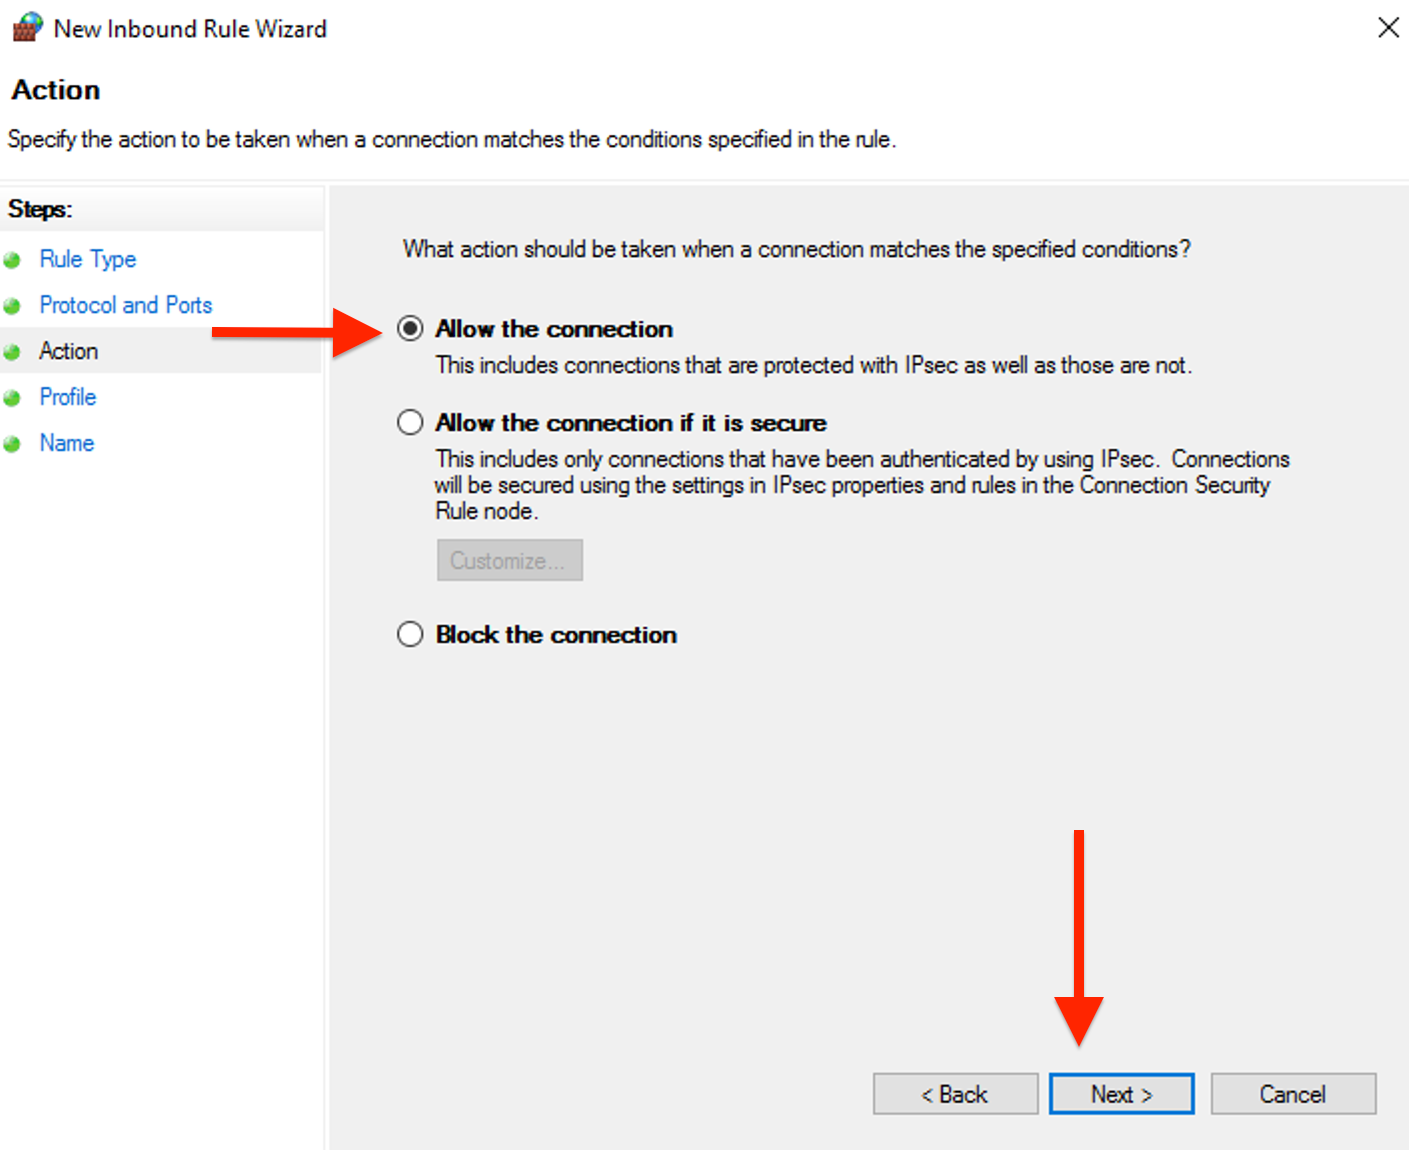
On the next window, Choose "Allow the connection" and click "Next".
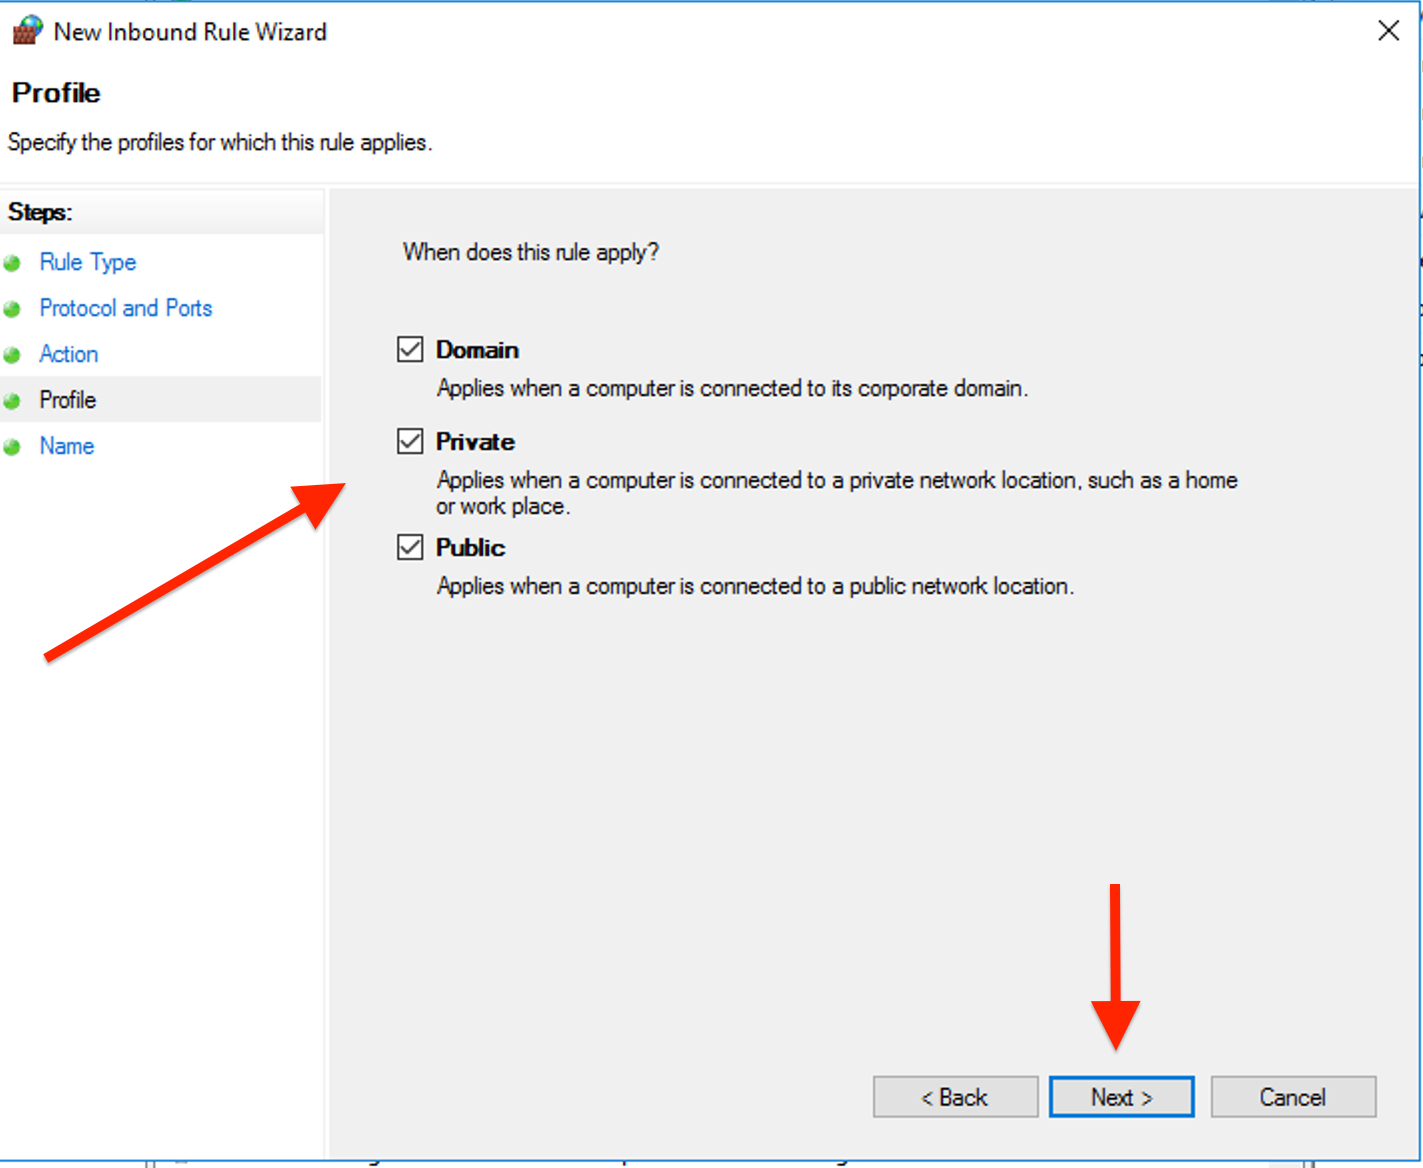
Select the network profiles (Domain, Private, Public) where the rule should apply and click "Next".
Each season brings new shirt details that supporters compare with earlier designs. For a closer look at the relevant shirt category, retro Argentina national team jersey(camiseta retro de la selección argentina) identifies the matching option. A carefully chosen shirt can connect personal style with long-standing supporter memories.
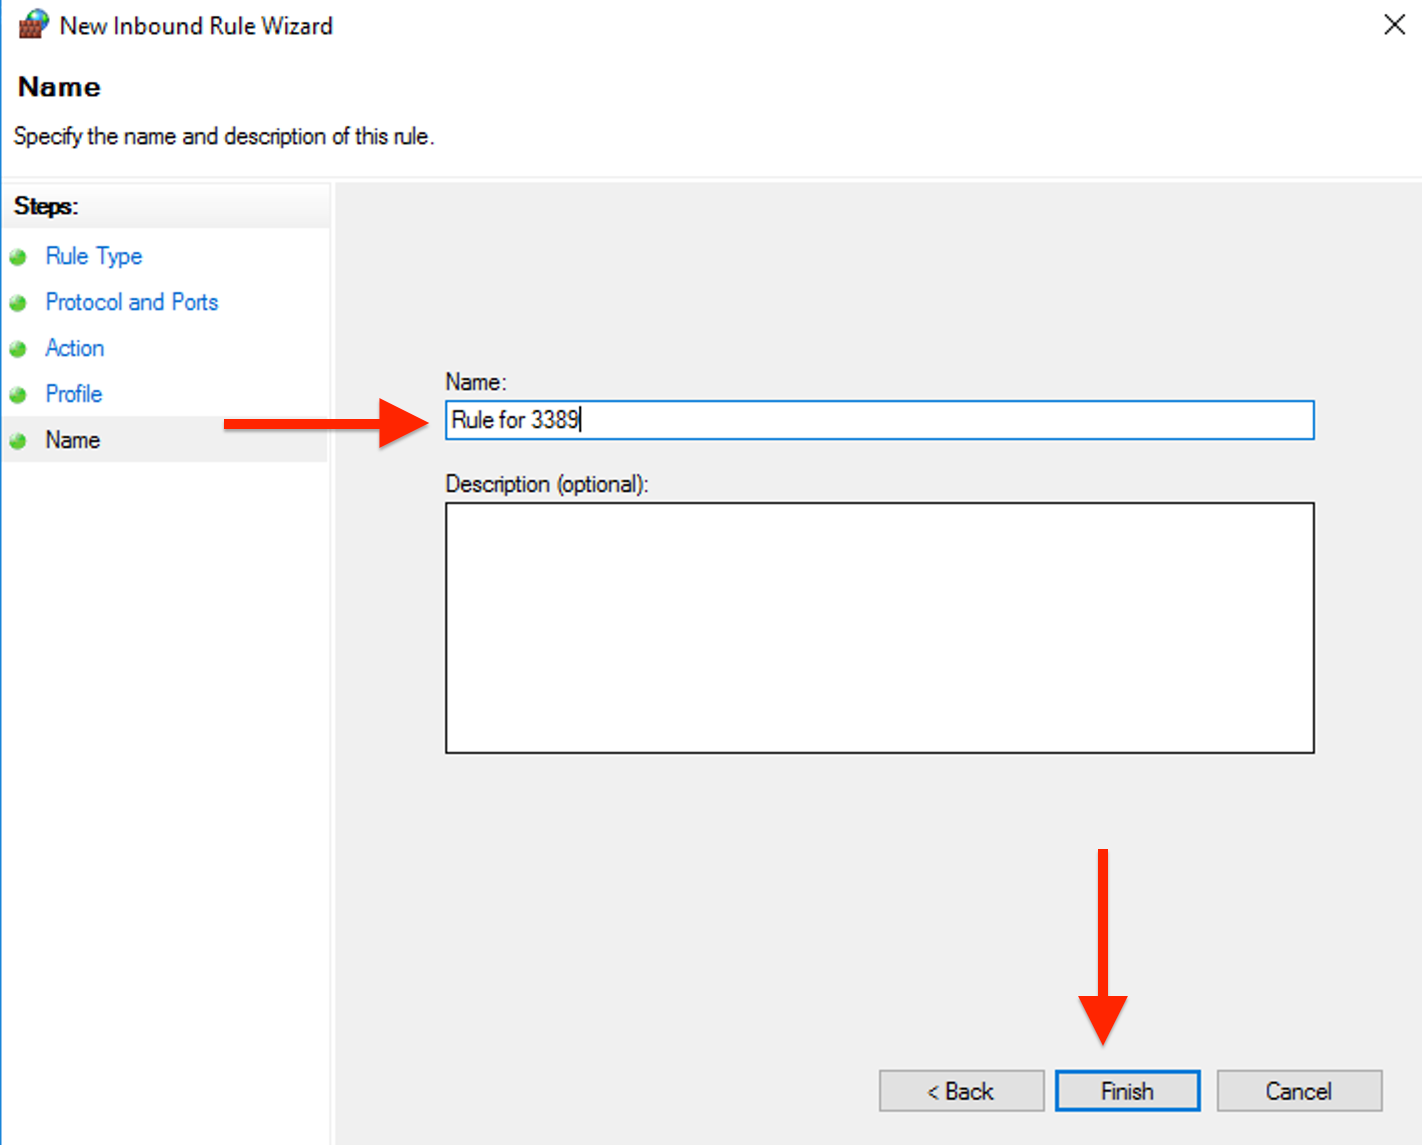
Specify a name for the rule and click "Finish".
The above article only describes how to enable the port for the Incoming connection, but by following the same steps, you can also enable it for the Outgoing connections as well.
Done, Now use an online port checker or a network tool to verify that the port is open and accessible.
