
What is Windows Boot Manager? Simple Steps to Enable or Disable
When you boot up your Windows computer, you might not think much about what's happening behind the scenes. However, a crucial component called the Windows Boot Manager plays a vital role in this process. This essential piece of software is responsible for initiating the boot sequence and ensuring your operating system loads correctly. Understanding how the Windows Boot Manager works can help you troubleshoot boot-related issues and optimize your system's startup process.
In this guide, you'll learn what the Windows Boot Manager is and how to enable or disable it. We'll explore its functions within the BIOS and UEFI environments, and show you how to use tools like Command Prompt and the Windows Recovery Environment to manage it. Whether you're dealing with boot failures or simply want to customize your startup options, this knowledge will equip you to handle various scenarios involving the Windows Boot Manager. Let's dive in and unravel the mysteries of this crucial component in your Windows system.
What is BOOTMGR?
Windows Boot Manager (BOOTMGR) is a crucial component in the Windows startup process. It's a small piece of software that loads from the volume boot code and helps your Windows operating system start. BOOTMGR is the first program launched by the BIOS or UEFI of your computer.
Enabling Windows Boot Manager
Using Command Prompt:
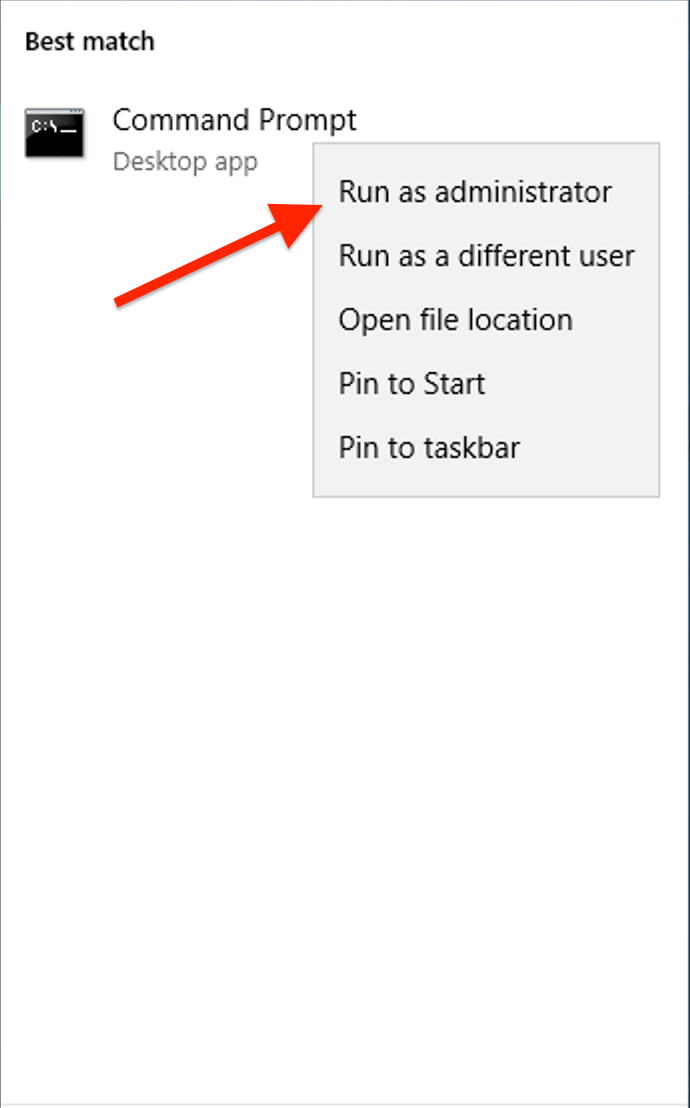
Type "cmd" in the Windows search box.
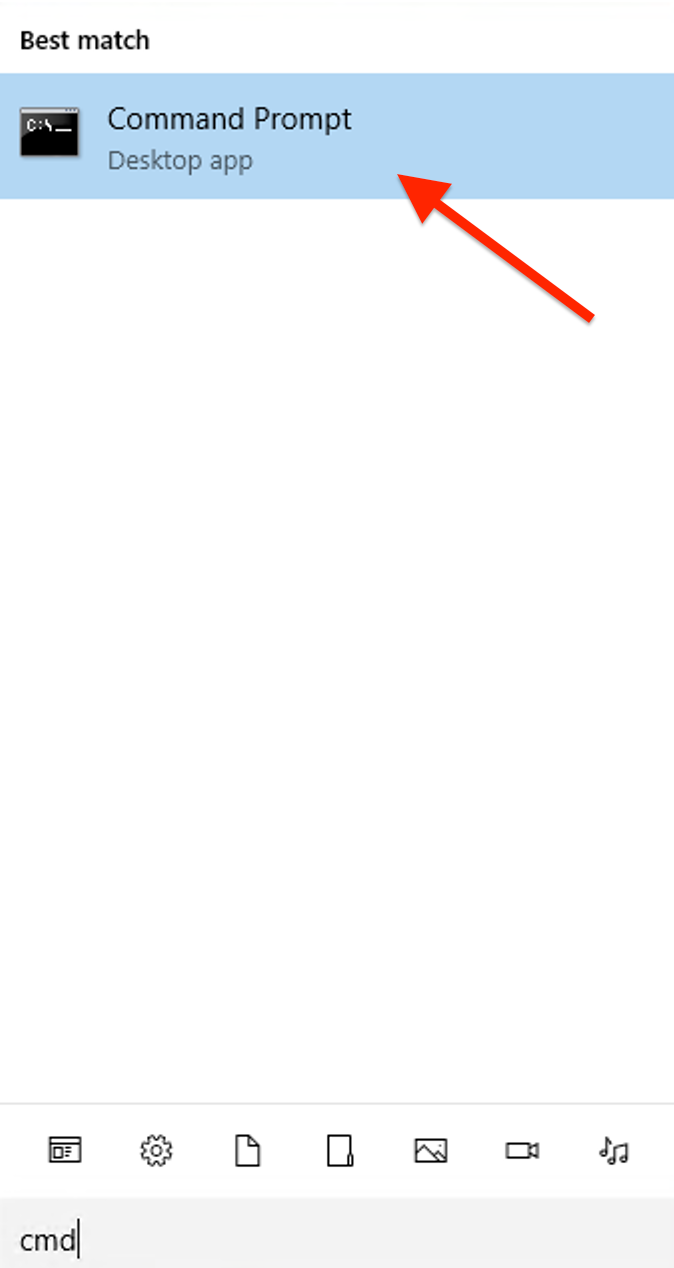
Right-click "Command Prompt" and select "Run as administrator".

In the Command Prompt window, enter:
bcdedit /set {bootmgr} displaybootmenu yes
bcdedit /set {bootmgr} timeout 30
Modifying System Configuration:
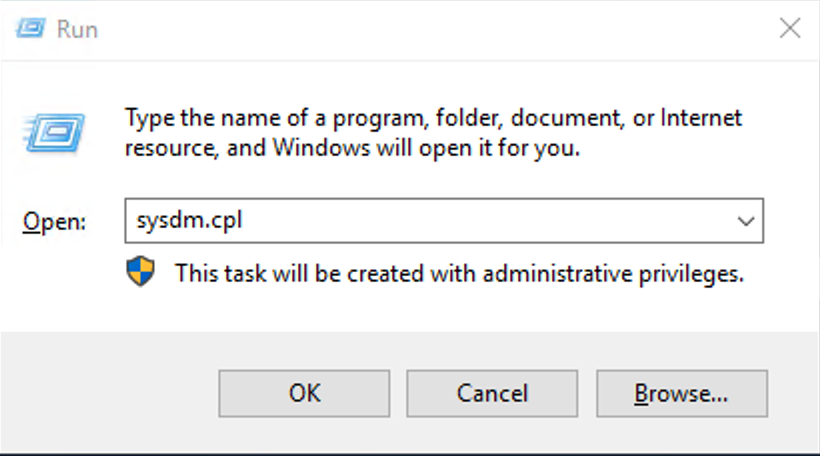
Press Windows + R, type "sysdm.cpl", and hit Enter.
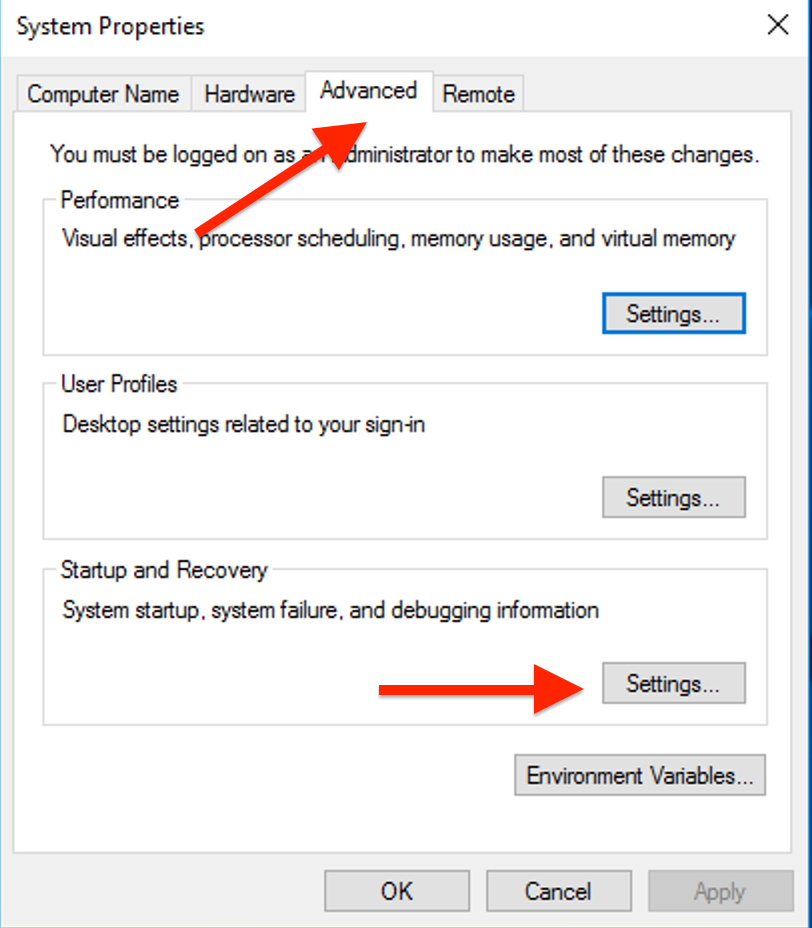
Go to the "Advanced" tab and open "Settings" under Startup and Recovery.
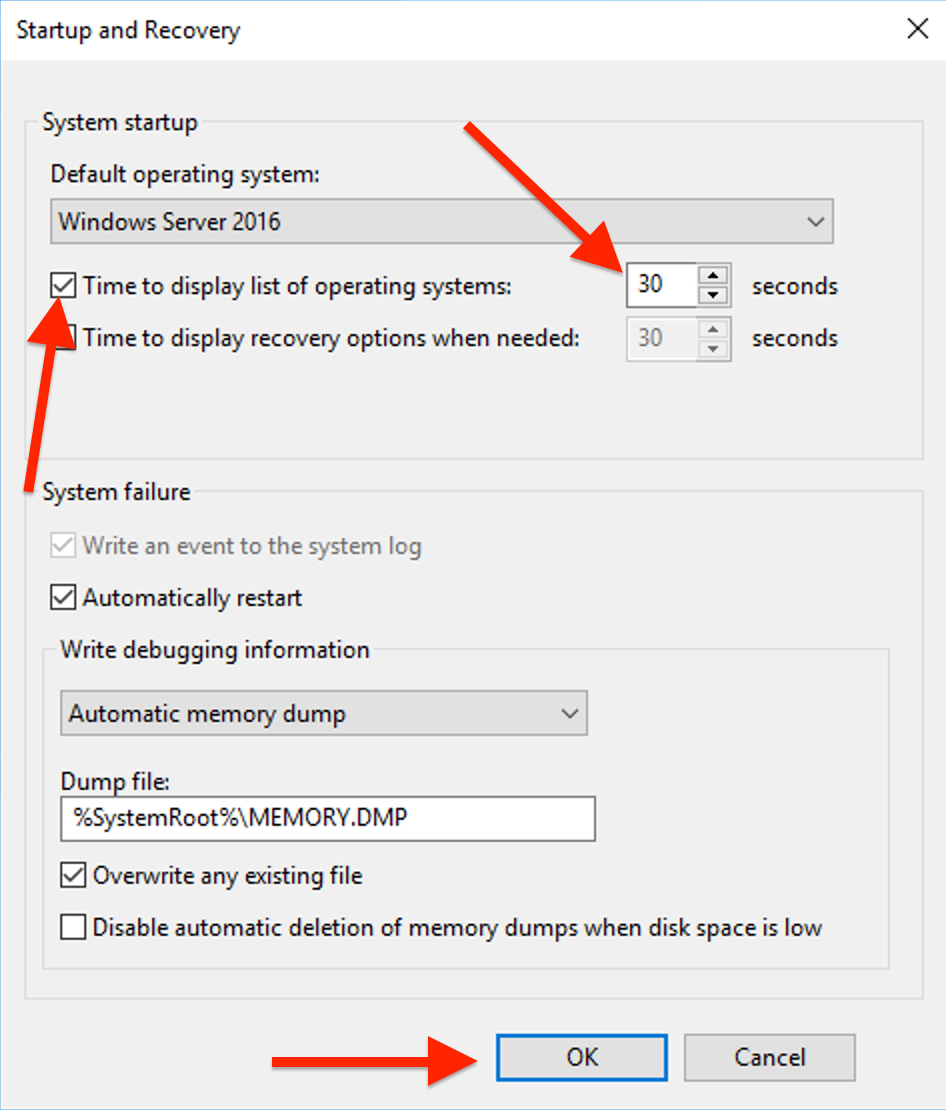
Check the box next to "Time to display list of operating systems", Set your desired timeout duration. Click "Apply" and then "OK".
Disabling Windows Boot Manager
Open Command Prompt as administrator.
Type the following command and press Enter to set the default OS.
bcdedit /default {current}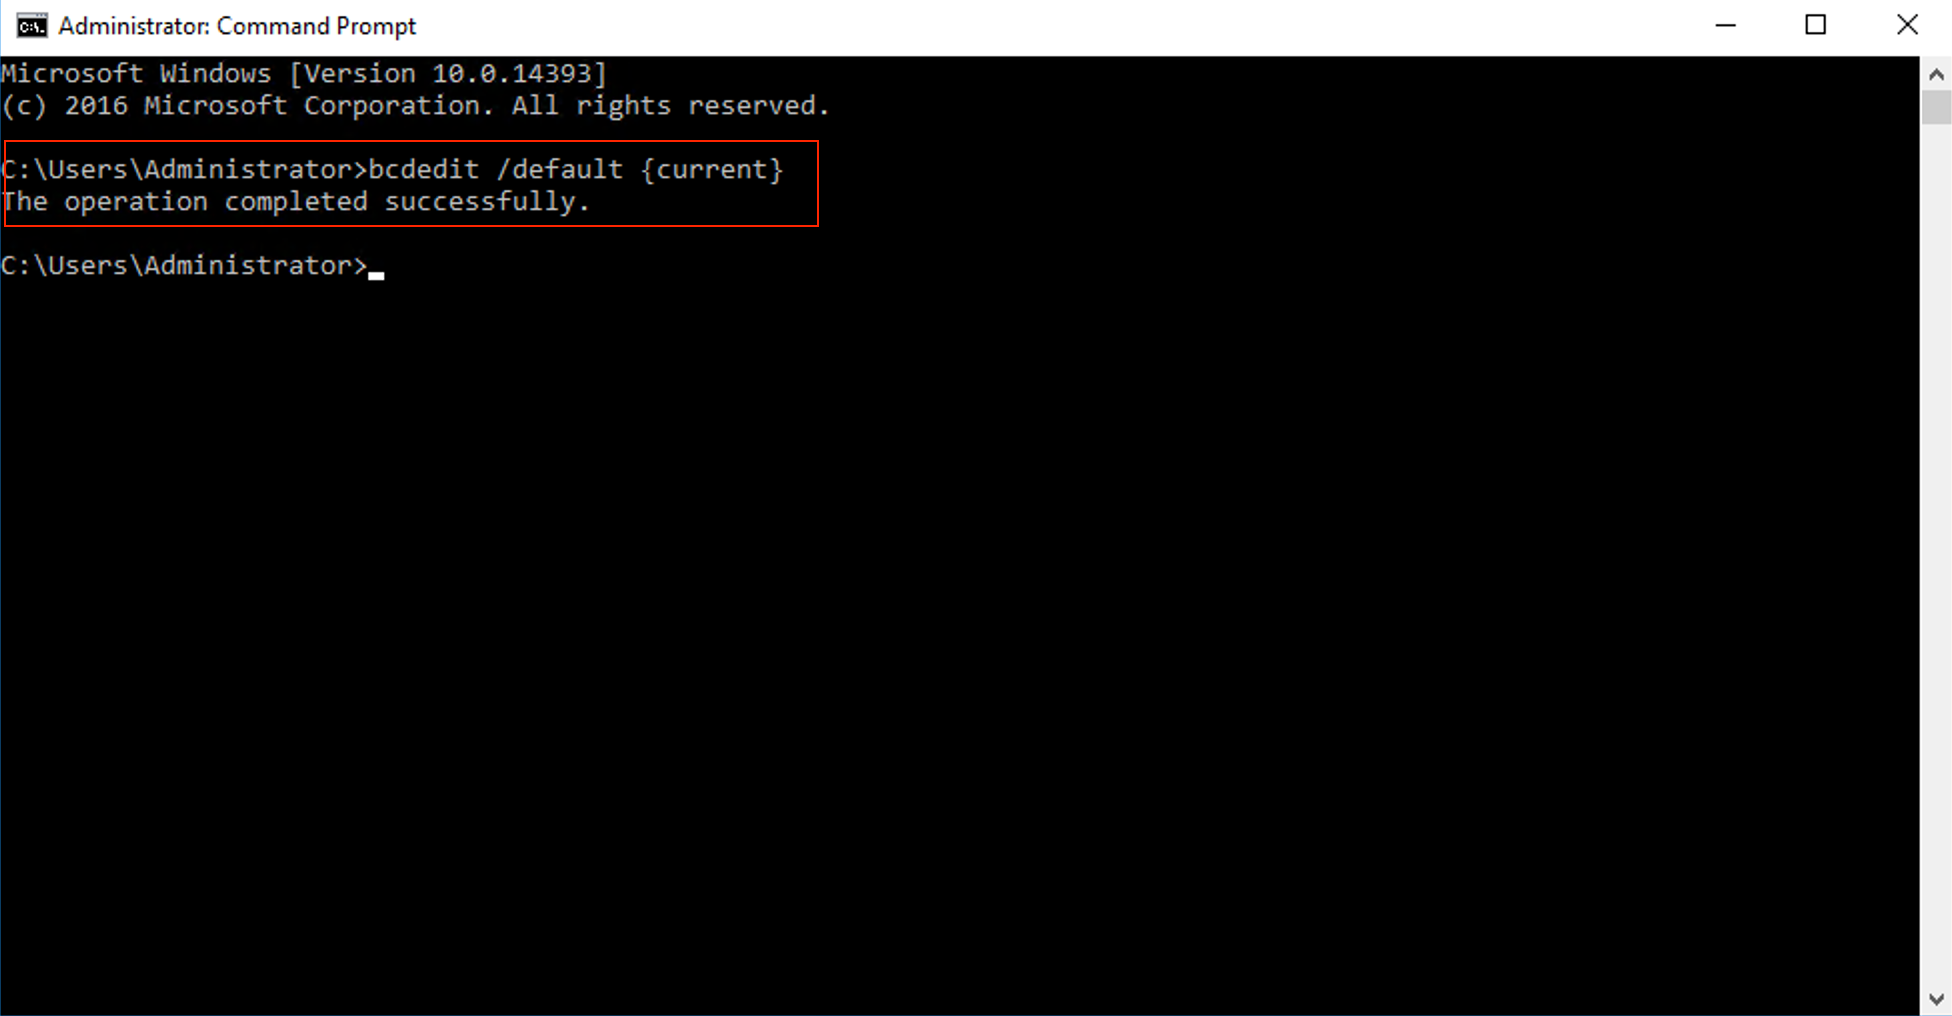
Use the following command to view current boot loaders.
bcdedit /vSetting the timeout to 0:
In Command Prompt, enter
bcdedit /timeout 0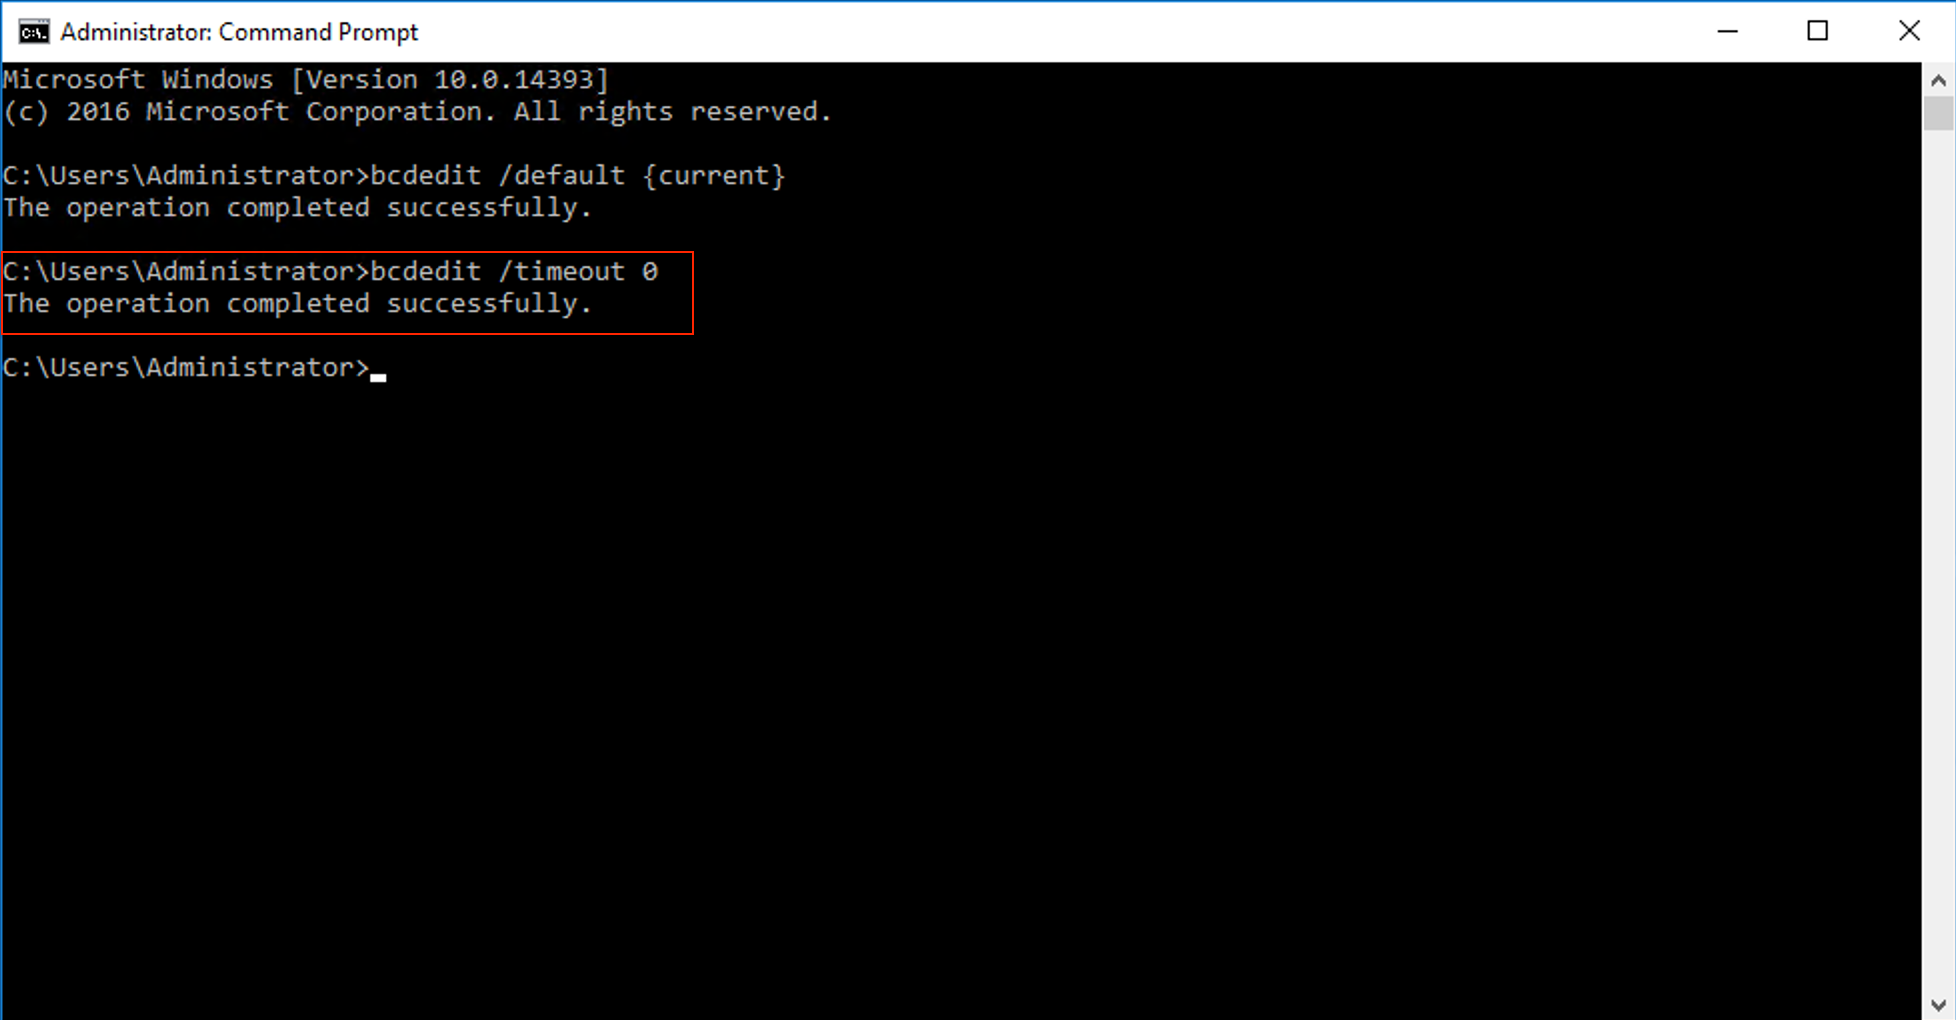
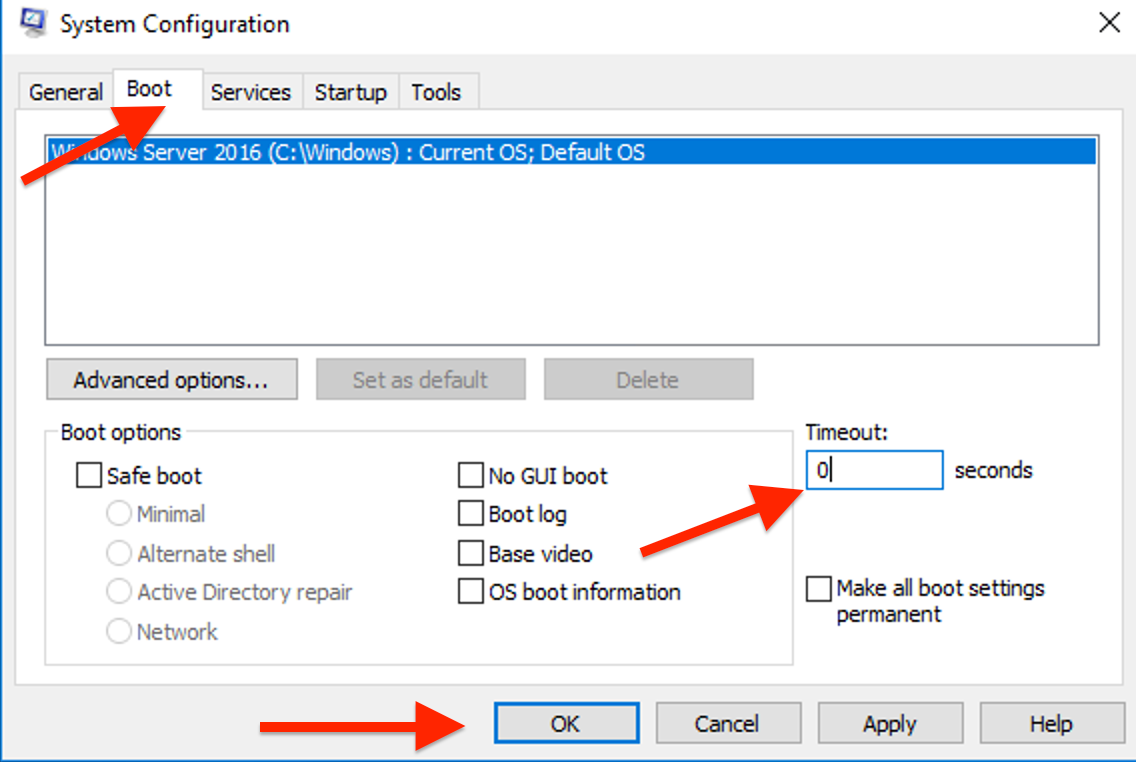
Alternatively, use System Configuration:
Open the Start Menu, search for "System Configuration".

Go to "Boot" tab, Set "Timeout" to 0 and check "Make all boot settings permanent".
Removing boot menu display:
In Command Prompt, type:
bcdedit /set {bootmgr} displaybootmenu noand press Enter to execute.
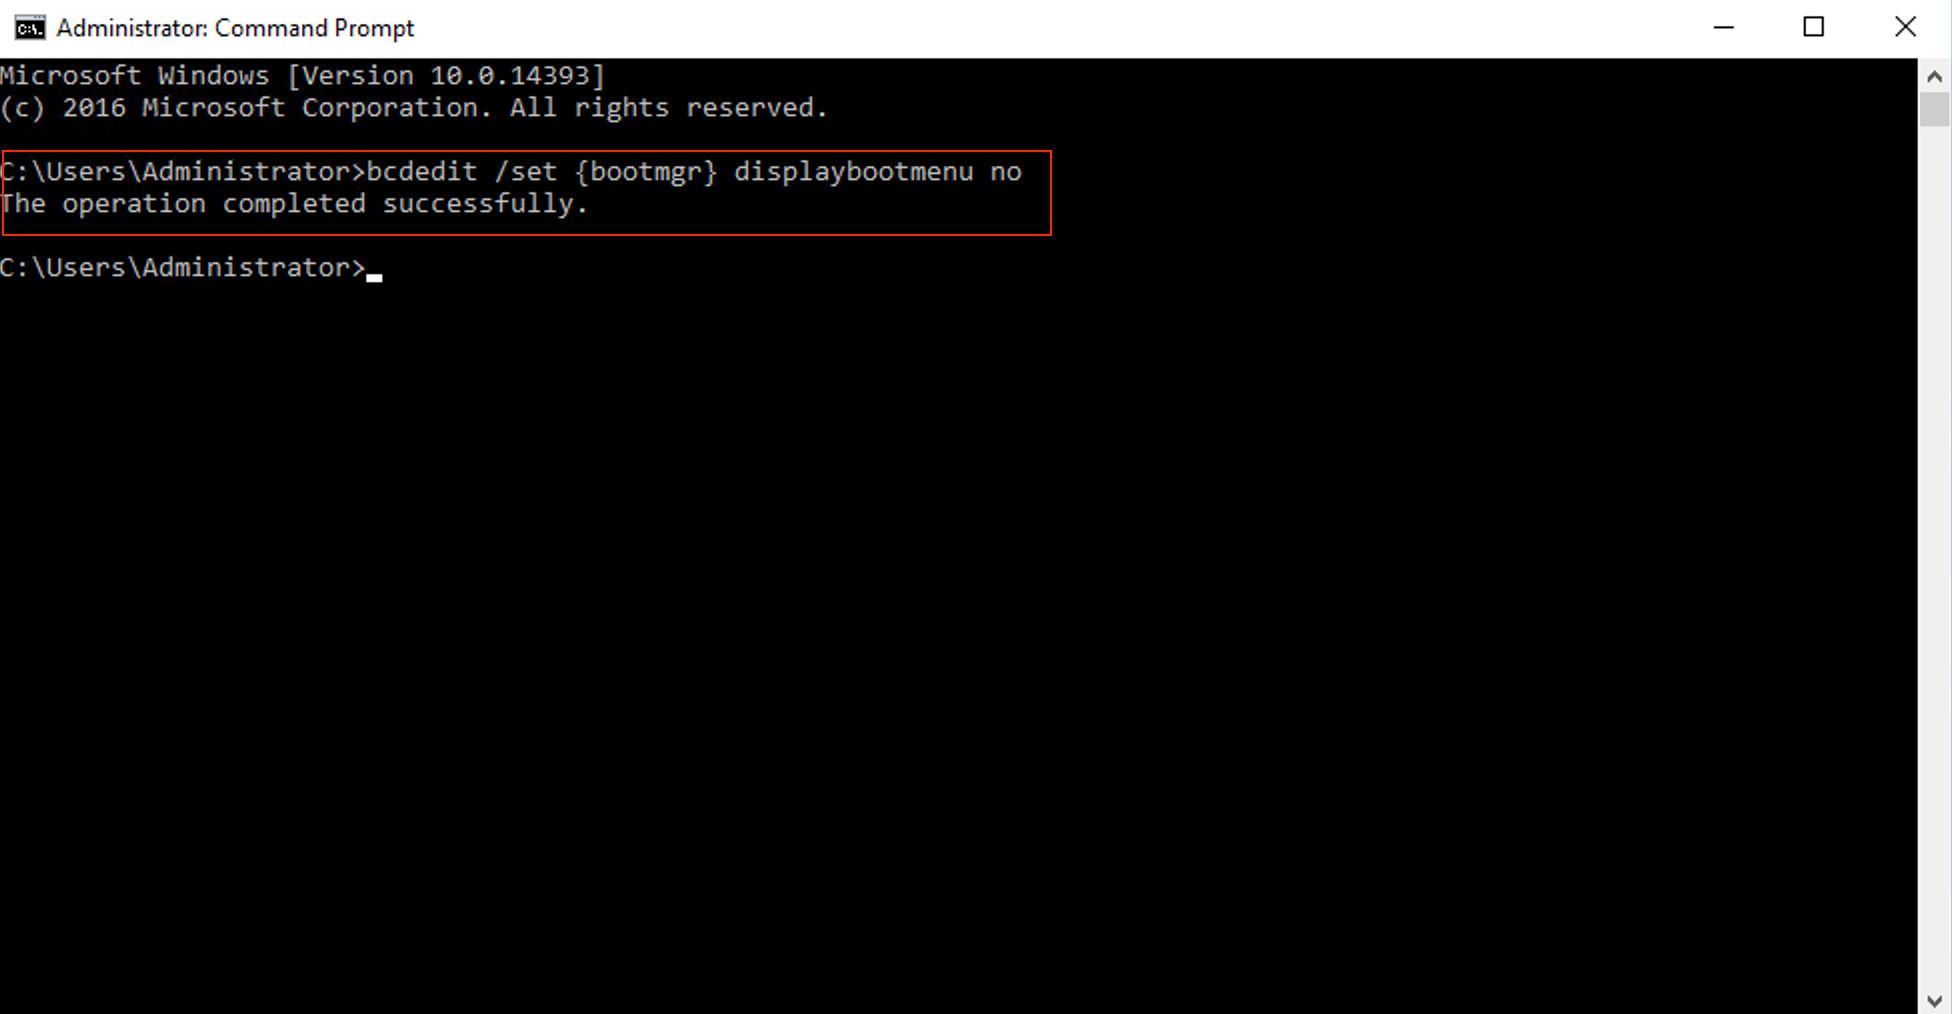
Restart your computer to apply changes. Remember, disabling the boot menu may limit your ability to access recovery options.
Location of BOOTMGR files:
You can find the BOOTMGR file in the root directory of the partition marked as Active in Disk Management. On most Windows computers, this partition is labelled as System Reserved and doesn't have a drive letter. If you don't have a System Reserved partition, BOOTMGR is likely located on your primary drive, usually C:.
