
How to restart network adapter on windows?
If you need to restart your network adapter on Windows, whether for troubleshooting or to refresh your network settings, this guide will walk you through the process. Whether you’re dealing with a network adapter card for PC or managing the network adapter driver for Windows 10, restarting the adapter can often resolve connectivity issues or apply new configurations. Follow these simple steps to restart your ethernet controller driver on Windows 10 or any other internet adapter driver for Windows 10, and get your network back up and running smoothly.
Method 1: Using GUI
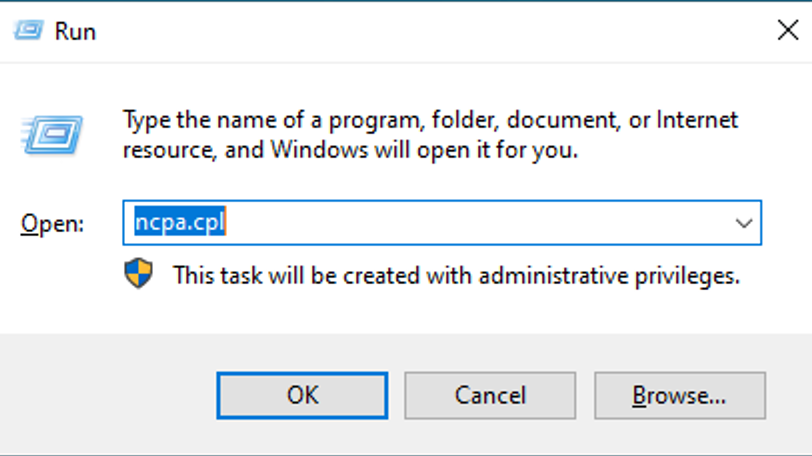
Press Win + R to open the Run dialog box, Type ncpa.cpl and press Enter. This opens the Network Connections window.
Locate the network adapter you want to restart. It’s usually labelled as "Ethernet" or something similar. Right-click on the network adapter and select Disable. This will turn off the network adapter.
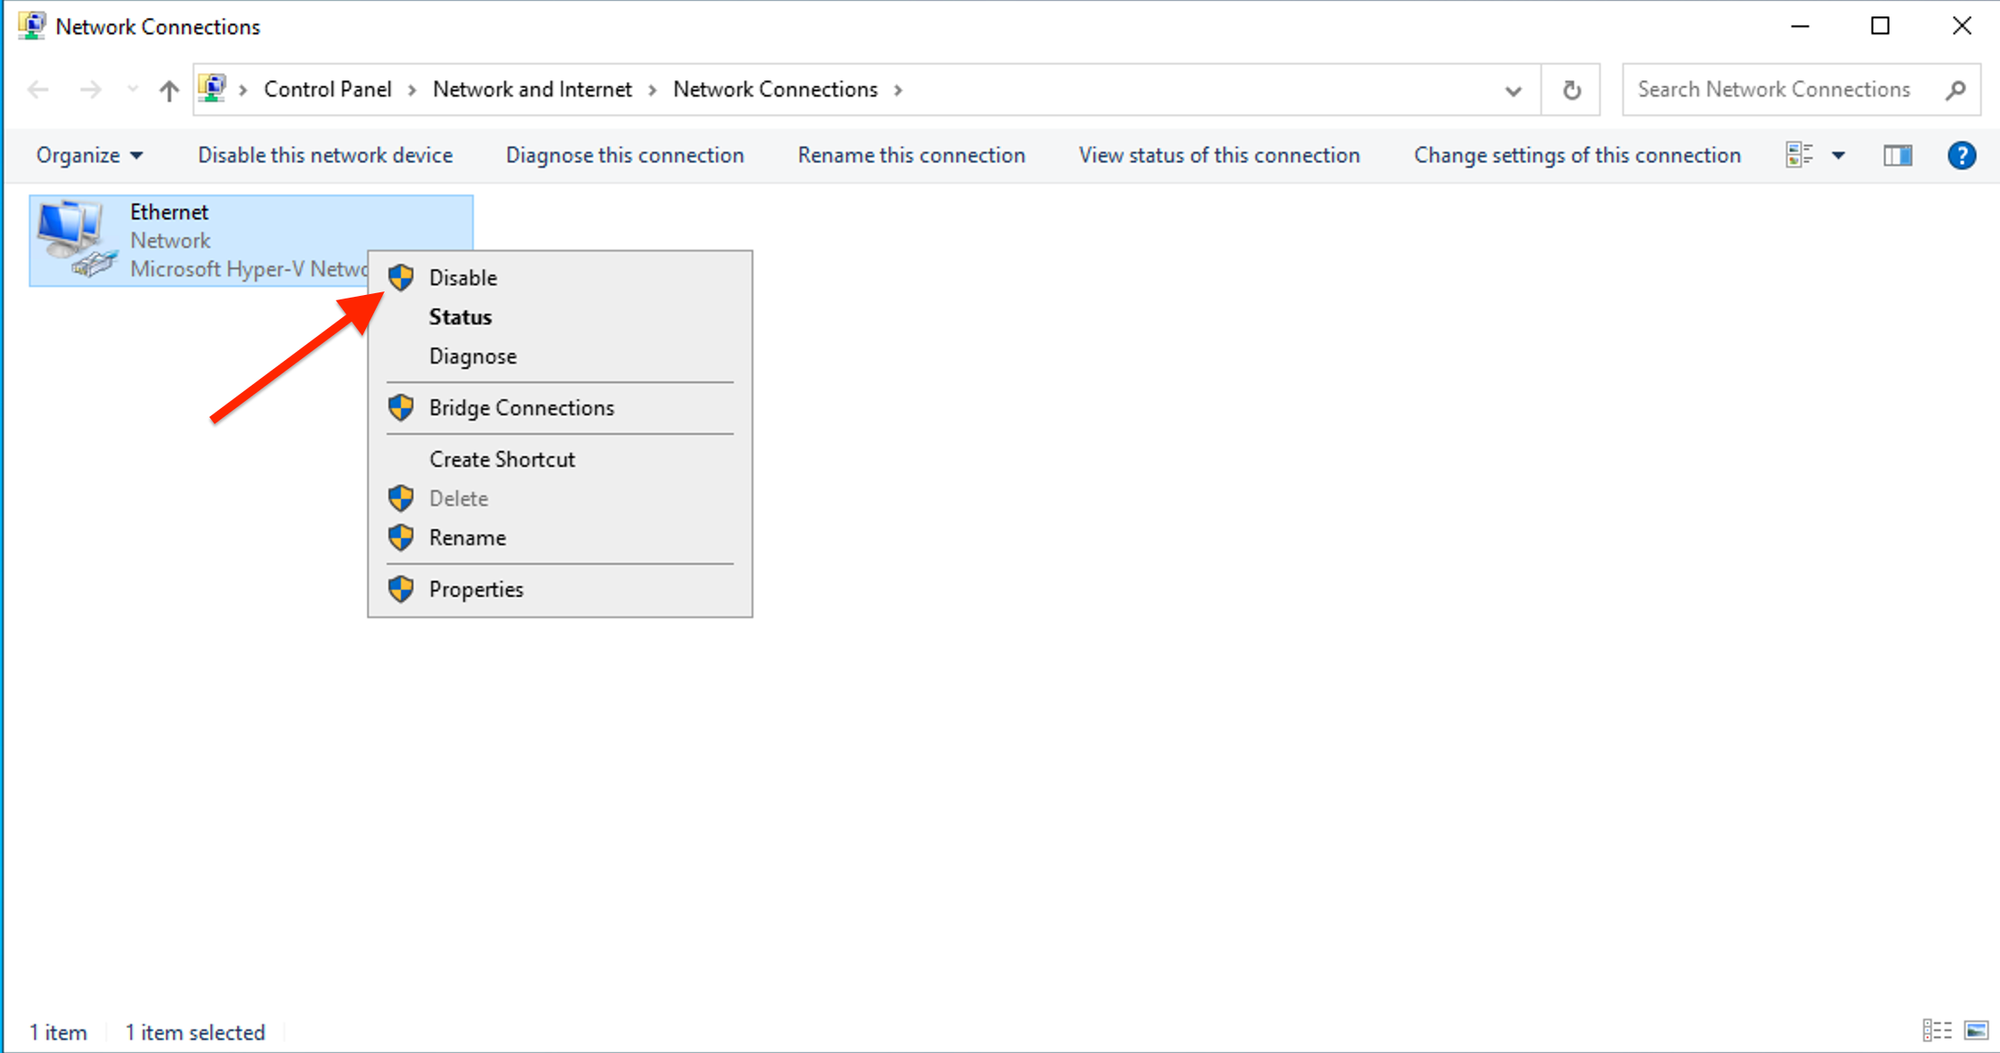
After a few moments, right-click on the same network adapter again and select Enable. This will restart the network adapter.
Method 2: Using Command-Line
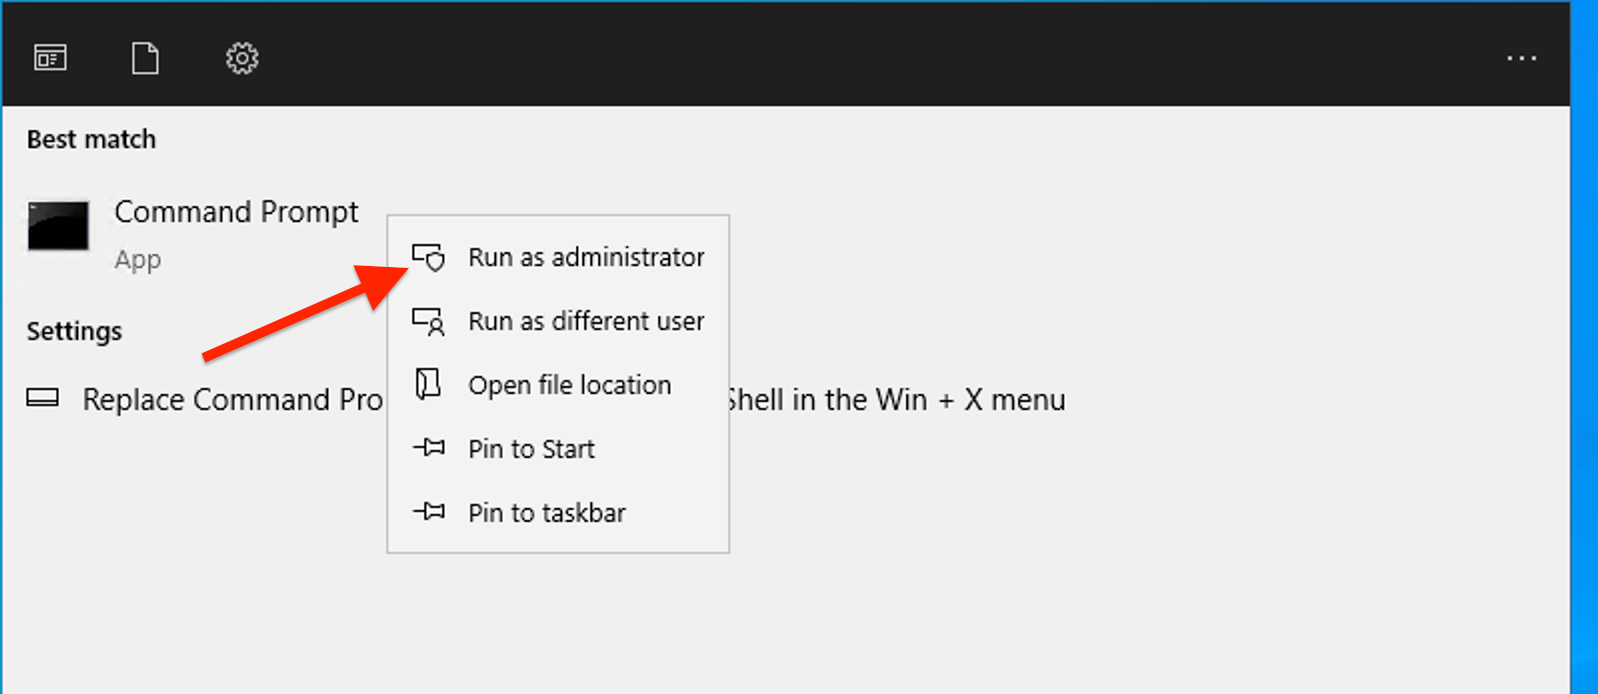
Type "cmd" in the Windows search box and Right-click "Command Prompt" and select "Run as administrator".
Run the following command to list all network interfaces:
netsh interface show interface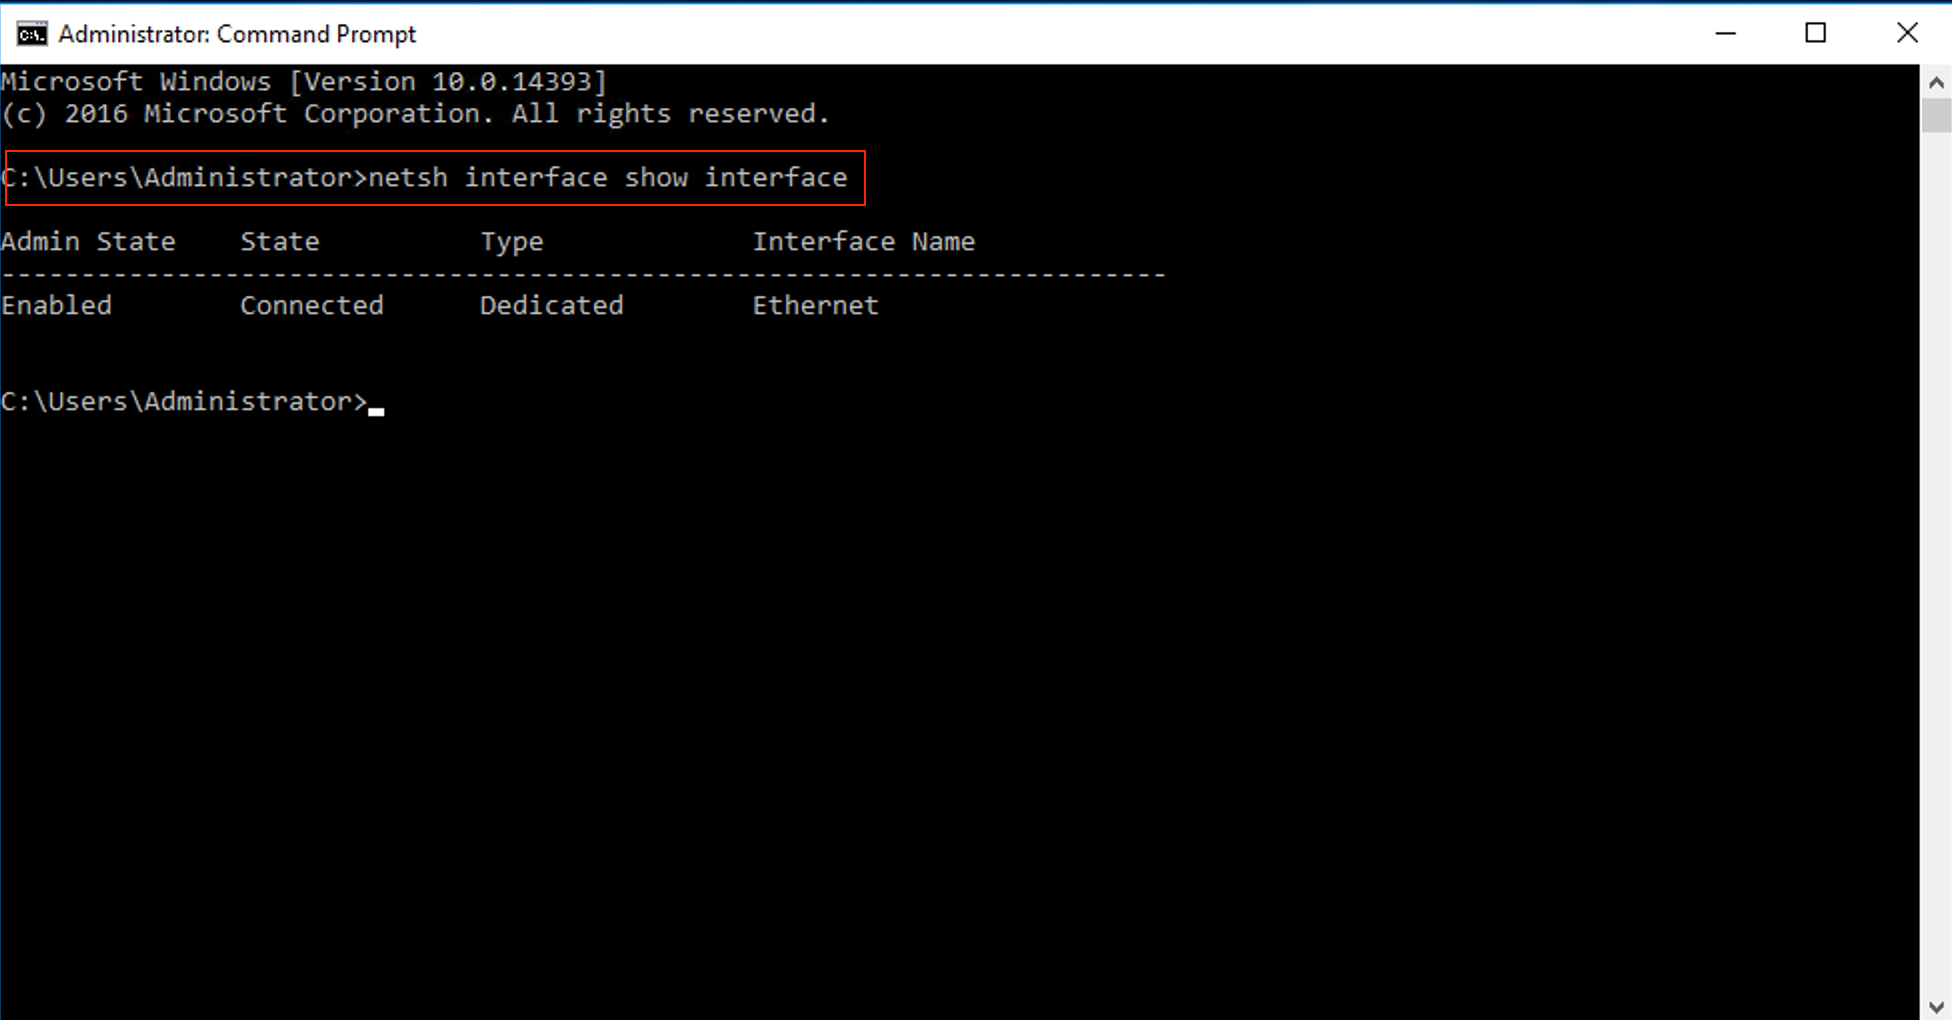
Use the following command to disable the network adapter:
netsh interface set interface "Interface Name" admin=disable
Replace "Interface Name" with the name of your network adapter (e.g., "Ethernet").
Now, use this command to enable the network adapter:
netsh interface set interface "Interface Name" admin=enable
